Features metafield method
Please follow this guide if you want to store your Cylindo features into a metafield, or if you got the following error message while going through the main guide:

This error comes from the fact that your Cylindo product features weren't configured to work in harmony with your Shopify product variants. The workaround is to create a Shopify variant metafield that will store the Cylindo features of each of your variants.
If you have many products with a lot of variants, this guide might take a lot of time to implement. In that case, you might want to reach out to our support team for a more personalized solution.
Add the metafield definition
Click on the Settings button on the Shopify admin dashboard left panel, then select Custom data and Variants as depicted below. This should list all metafields associated with product variants. Click on the Add definition button:
Fill in the fields with the following values:

Click Save, then close the settings.
Configure the products
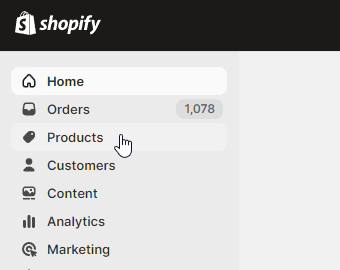
Select the Products menu on the left side panel:
You should see a list of all products in your store. Select one-by-one every product you plan to integrate the viewer with, and scroll down to the Variants section. Select all variants, and then click Bulk edit. You'll be presented with an interface where you can edit every field of every variants of the product you selected. Make sure the cylindo_features column appears by selecting it in the Columns button, such as depicted here:
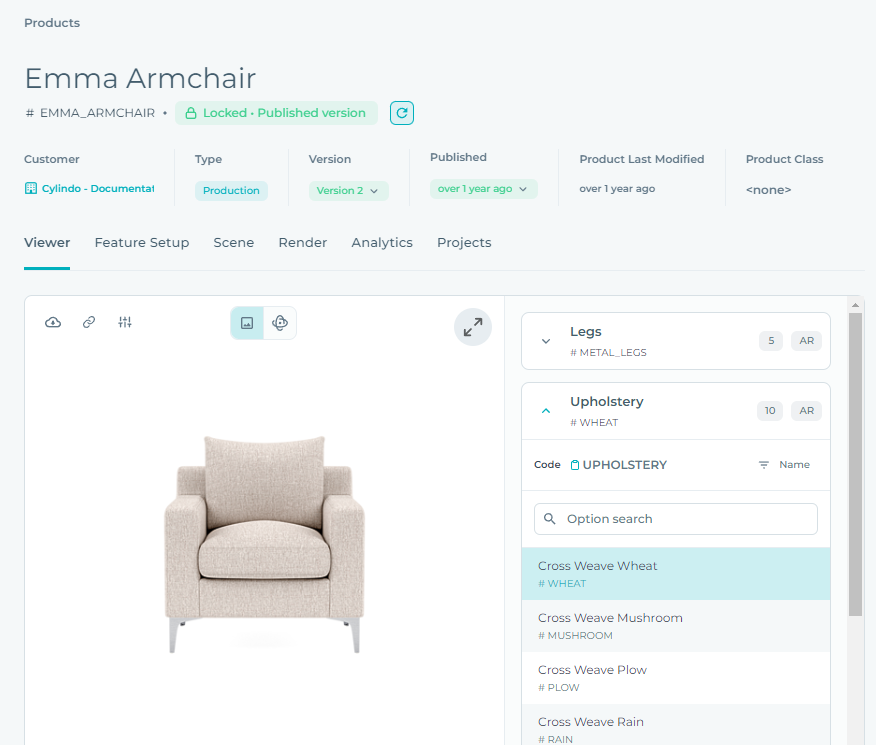
In another tab, go on your Cylindo products page, and select the associated product. You should see the following:
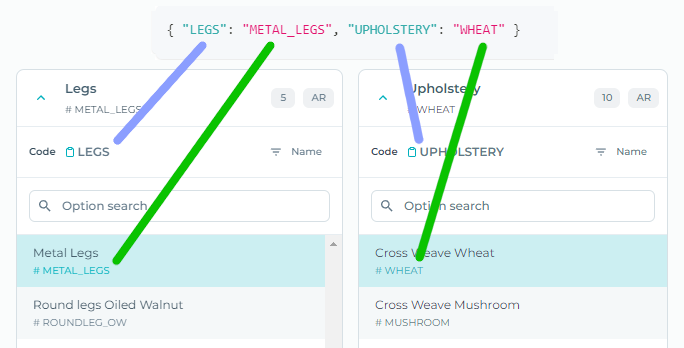
We'll now build the features object of every variant appearing on Shopify.
A features object contains all the information needed to render the variant. It has the following format:
{ "FEATURE1_CODE": "FEATURE1_VALUE", "FEATURE2_CODE": "FEATURE2_VALUE" }
In the case of the example above, the corresponding features object is
{ "LEGS": "METAL_LEGS", "UPHOLSTERY": "WHEAT" }
Build the features object by matching each feature code with its value. You can find all relevant values here:
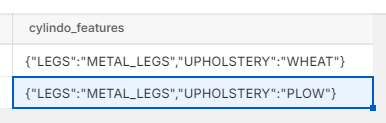
For every variant, copy its features object into its corresponding cylindo_features cell in the Shopify interface. The end result should look like this:
Make sure that every features object is a valid JSON object. You can verify it on this website.
Click on the Save button at the top right corner, and proceed to the next product. This process must be repeated for every product you plan to integrate the viewer with.
Edit the theme code
Go back to the homepage of the Shopify admin dashboard. Your variants are now well-configured, but we still need to make some changes to the theme custom code.
Click on the current theme's menu button, and select Edit code. Open the file product-media-gallery.liquid. You'll now replace the following line:
features-by-variant-id='{ {% for variant in product.variants %}"{{ variant.id }}": { {% for option in product.options_with_values %}{{ option.name | json }}: {{ variant.options[forloop.index0] | json }}{% unless forloop.last %},{% endunless %}{% endfor %} }{% unless forloop.last %},{% endunless %}{% endfor %} }'
with this one
features-by-variant-id='{ {% for variant in product.variants %}"{{ variant.id }}": {{ variant.metafields.cylindo.cylindo_features }}{% unless forloop.last %},{% endunless %}{% endfor %} }'
Click on the Save button, and preview the store. The product should now load correctly.