Magento Implementation
Adobe Commerce is a popular e-commerce platform that helps customers to build multichannel commerce experiences for B2B and B2C from a single platform. This platform offers hundreds of features allowing contributors to connect with their customers and sell their products.
To read more about this platform, Adobe provides complete information on their official website.
This guide will implement the Cylindo 360 HD Viewer into a webshop running the Magento platform.
Environment preparation
1. Install the Magento platform
For this guide, Cylindo's customers should have the Adobe Commerce (Magento) platform installed on their servers.
If it is not already installed, it must be installed following the installation guide provided by Adobe on its official site.
For this example, we've installed Magento version 2.4.3
2. Login
Login into the admin panel of the Magento platform

3. Create a Configurable product:
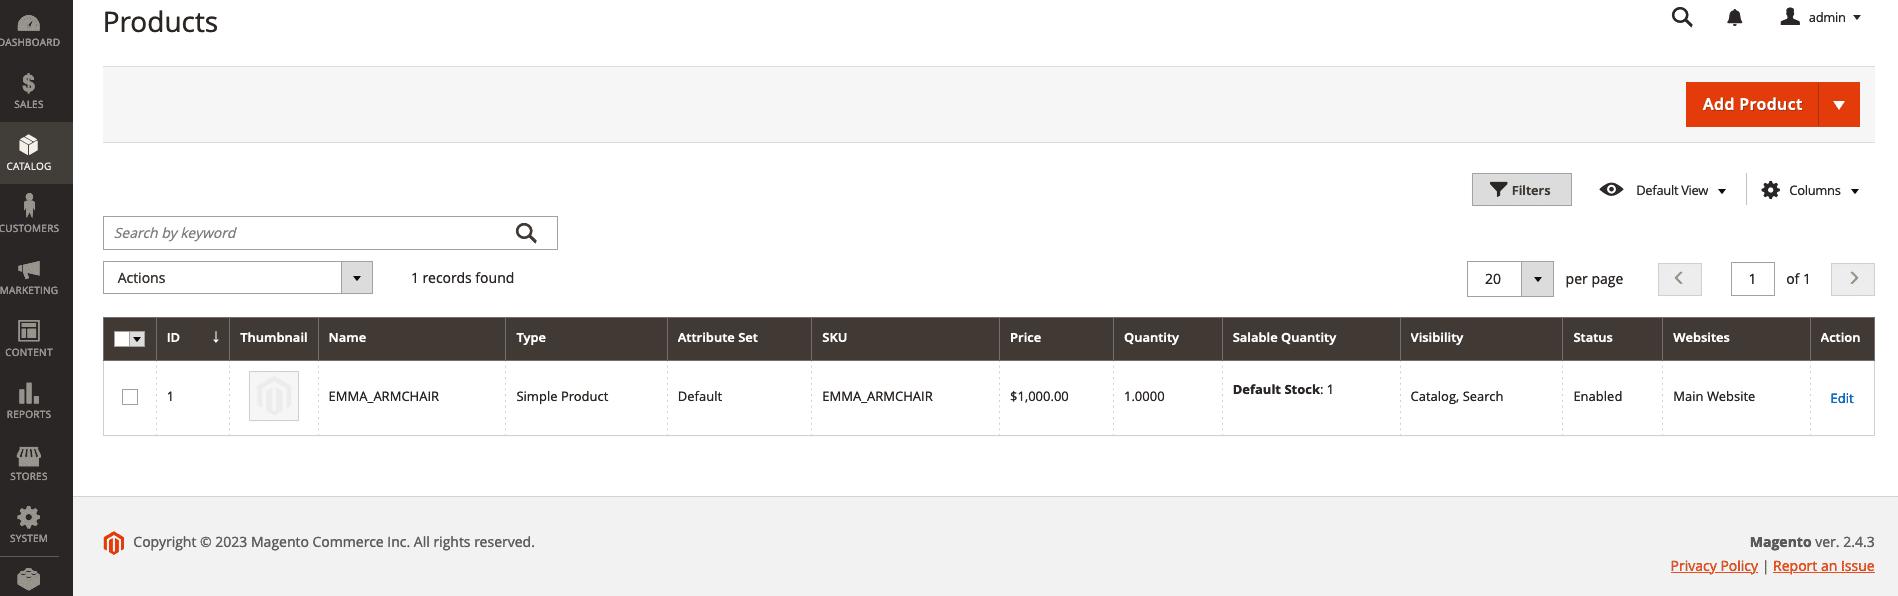
Go to the Products option under the Catalog menu on the Admin sidebar.
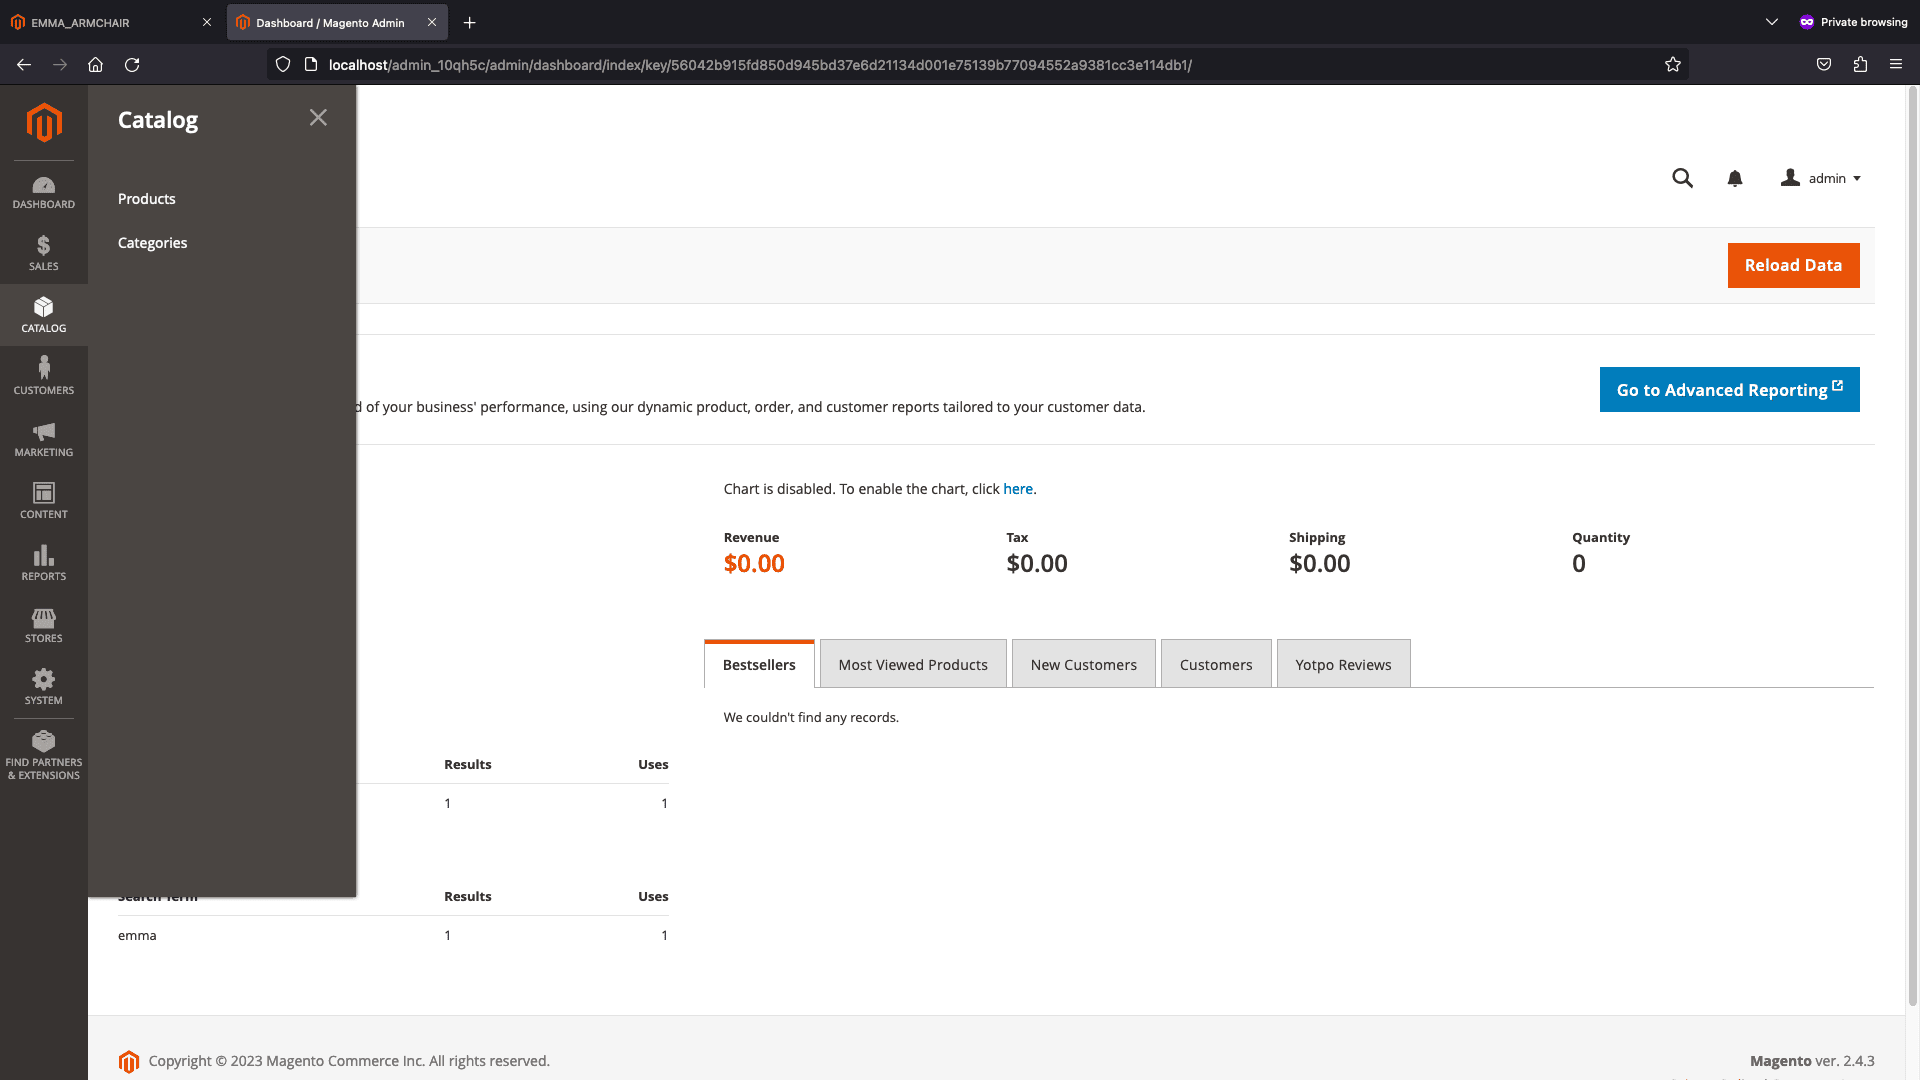
Click the arrow button from the Add Product button of the upper-right corner, and choose Configurable Product.

Fill out the form with the product information. For this example, we are going to use the Emma Armchair product.
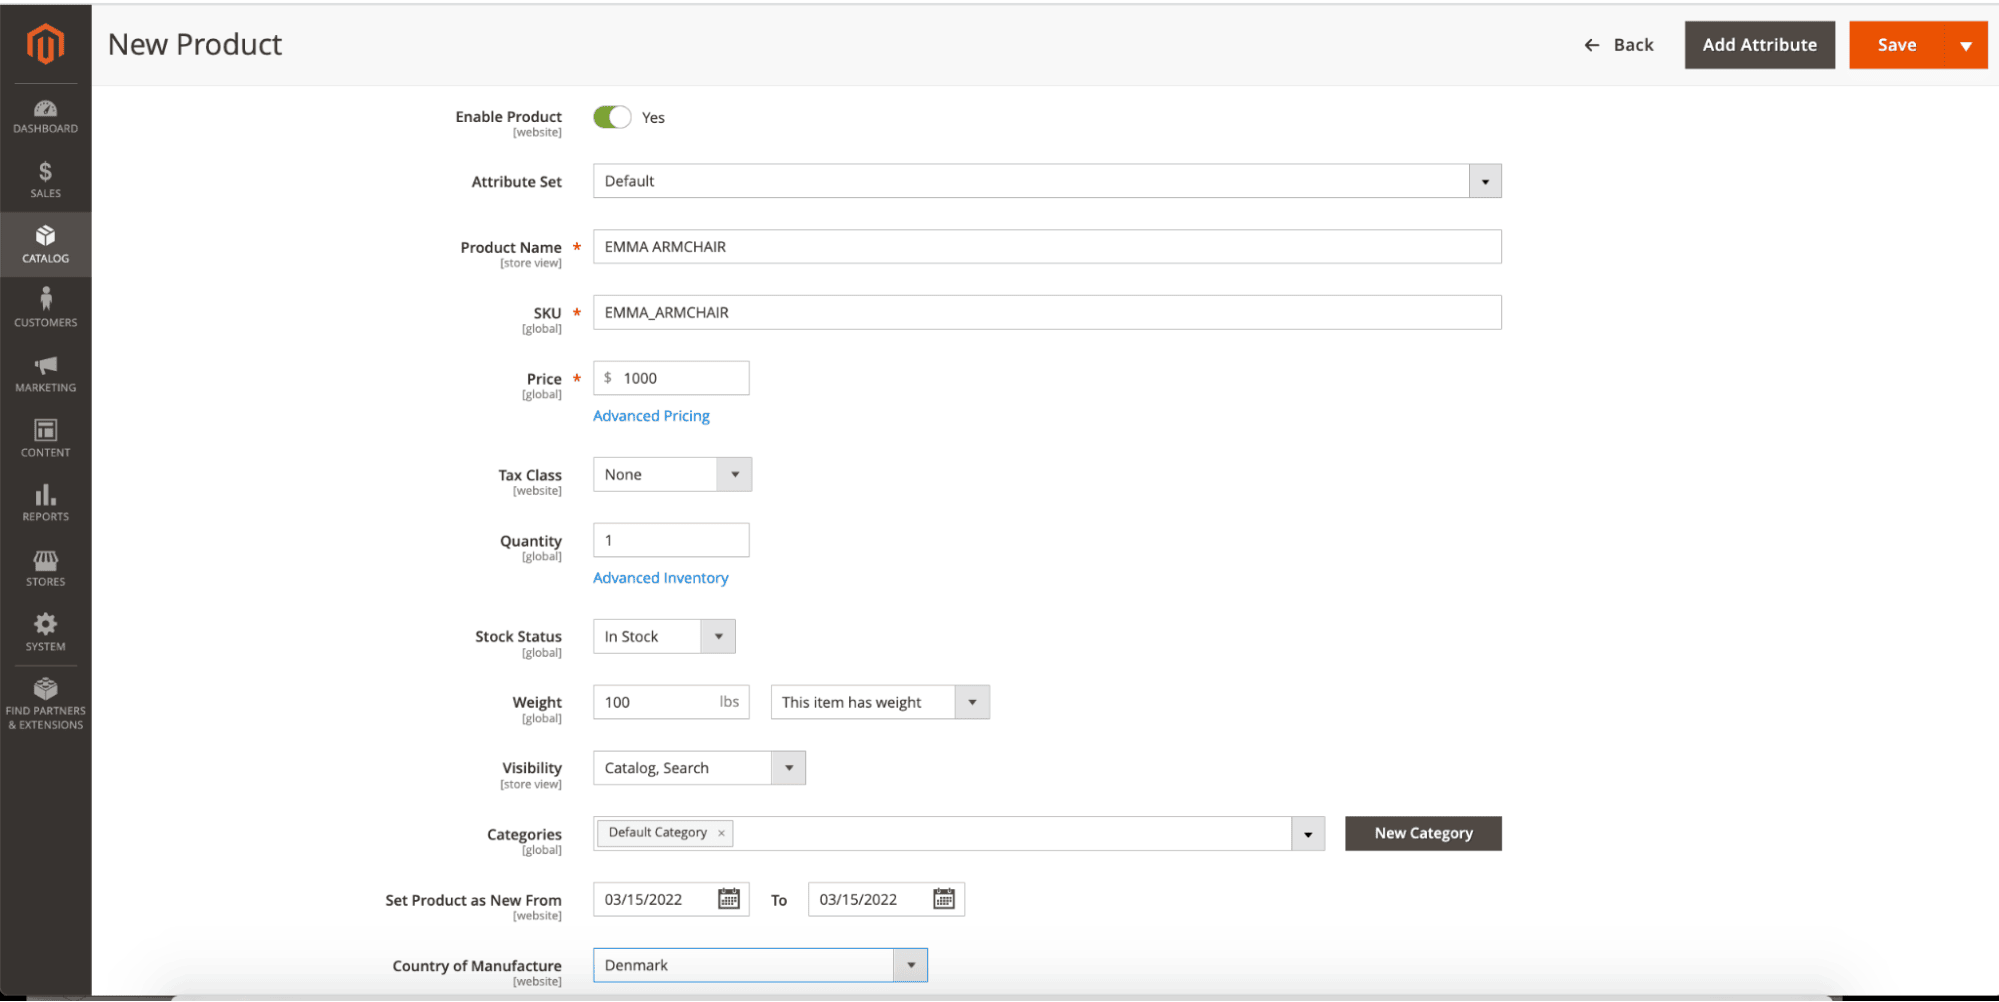
When all the information is filled in, click on the Save button displayed in the button shown in the upper-right corner. For more configuration options, our suggestion is to read the official documentation.
4. Add Product Configuration
we are ready to add configurations when the product is created. For this example, we will add options to change the Upholstery (with three variations) and the Legs (with three variations) of the Emma Armchair product. By default, Magento creates simple products with unique SKUs for each of the nine combinations. This is to cover every possible combination of the variations mentioned above. It is also worth mentioning that by default, the product name and SKU values for each variation are assigned based on the attribute value and either the parent product name or SKU.
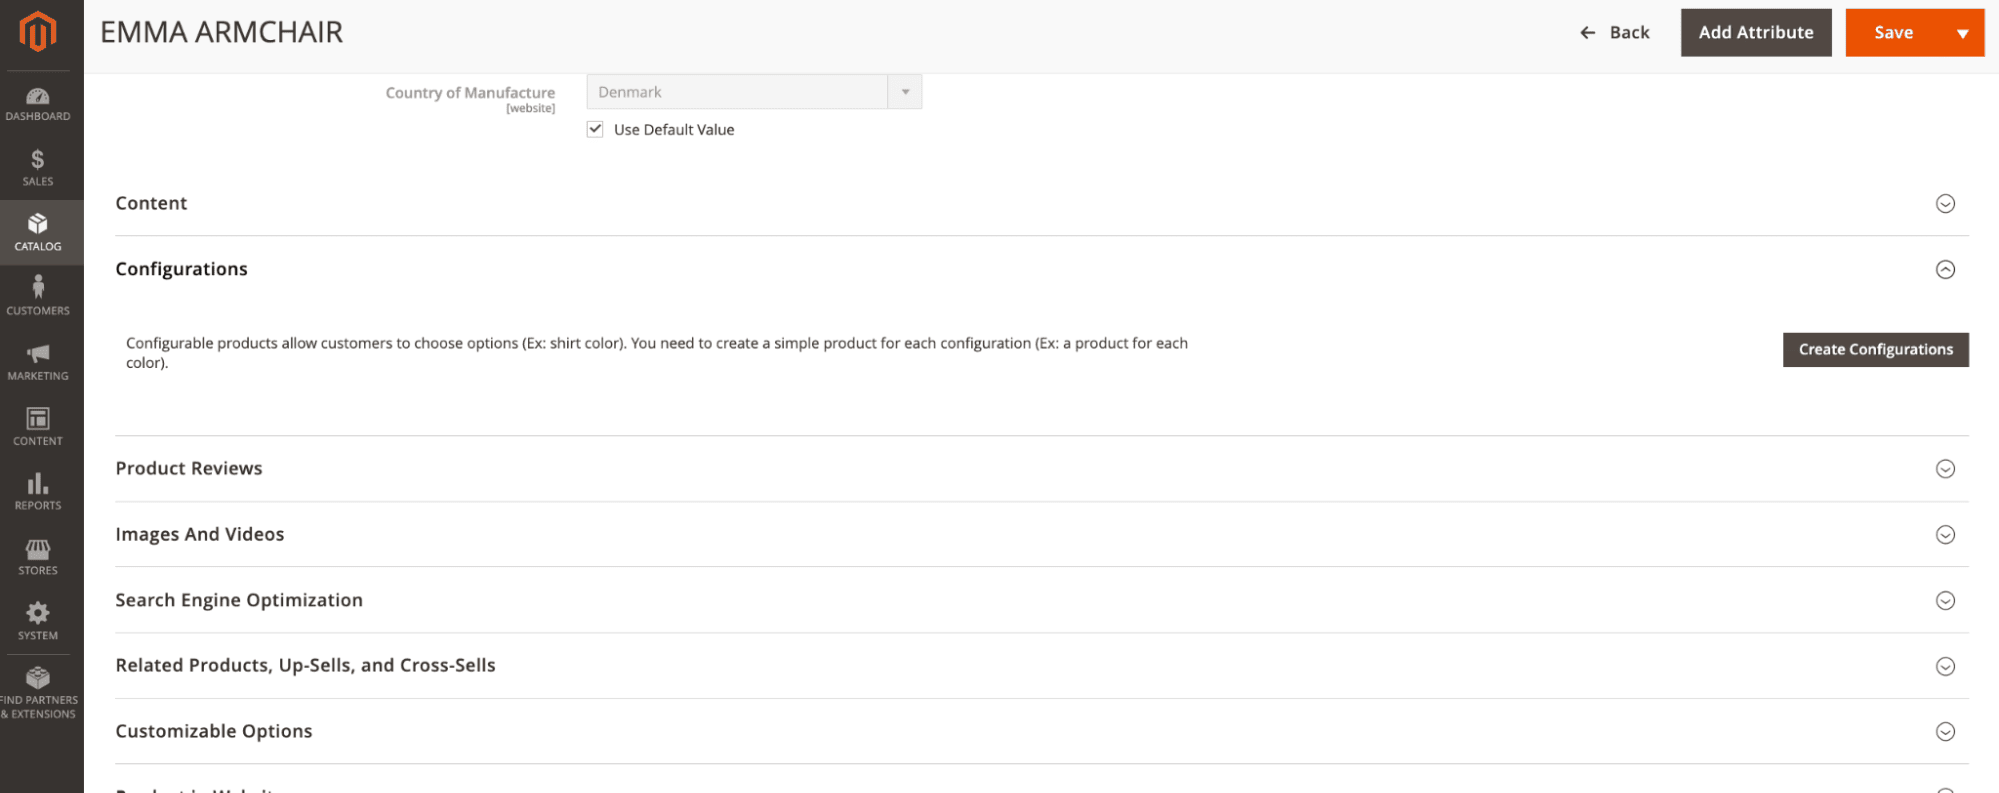
To add the configurations, we first select the created product and click the Edit option displayed in the last column of the products table.
When the Edit form of the Product is open, scroll down to the Configurations section and click the Create Configurations button.
In the modal window displayed, select the option Create New Attribute.
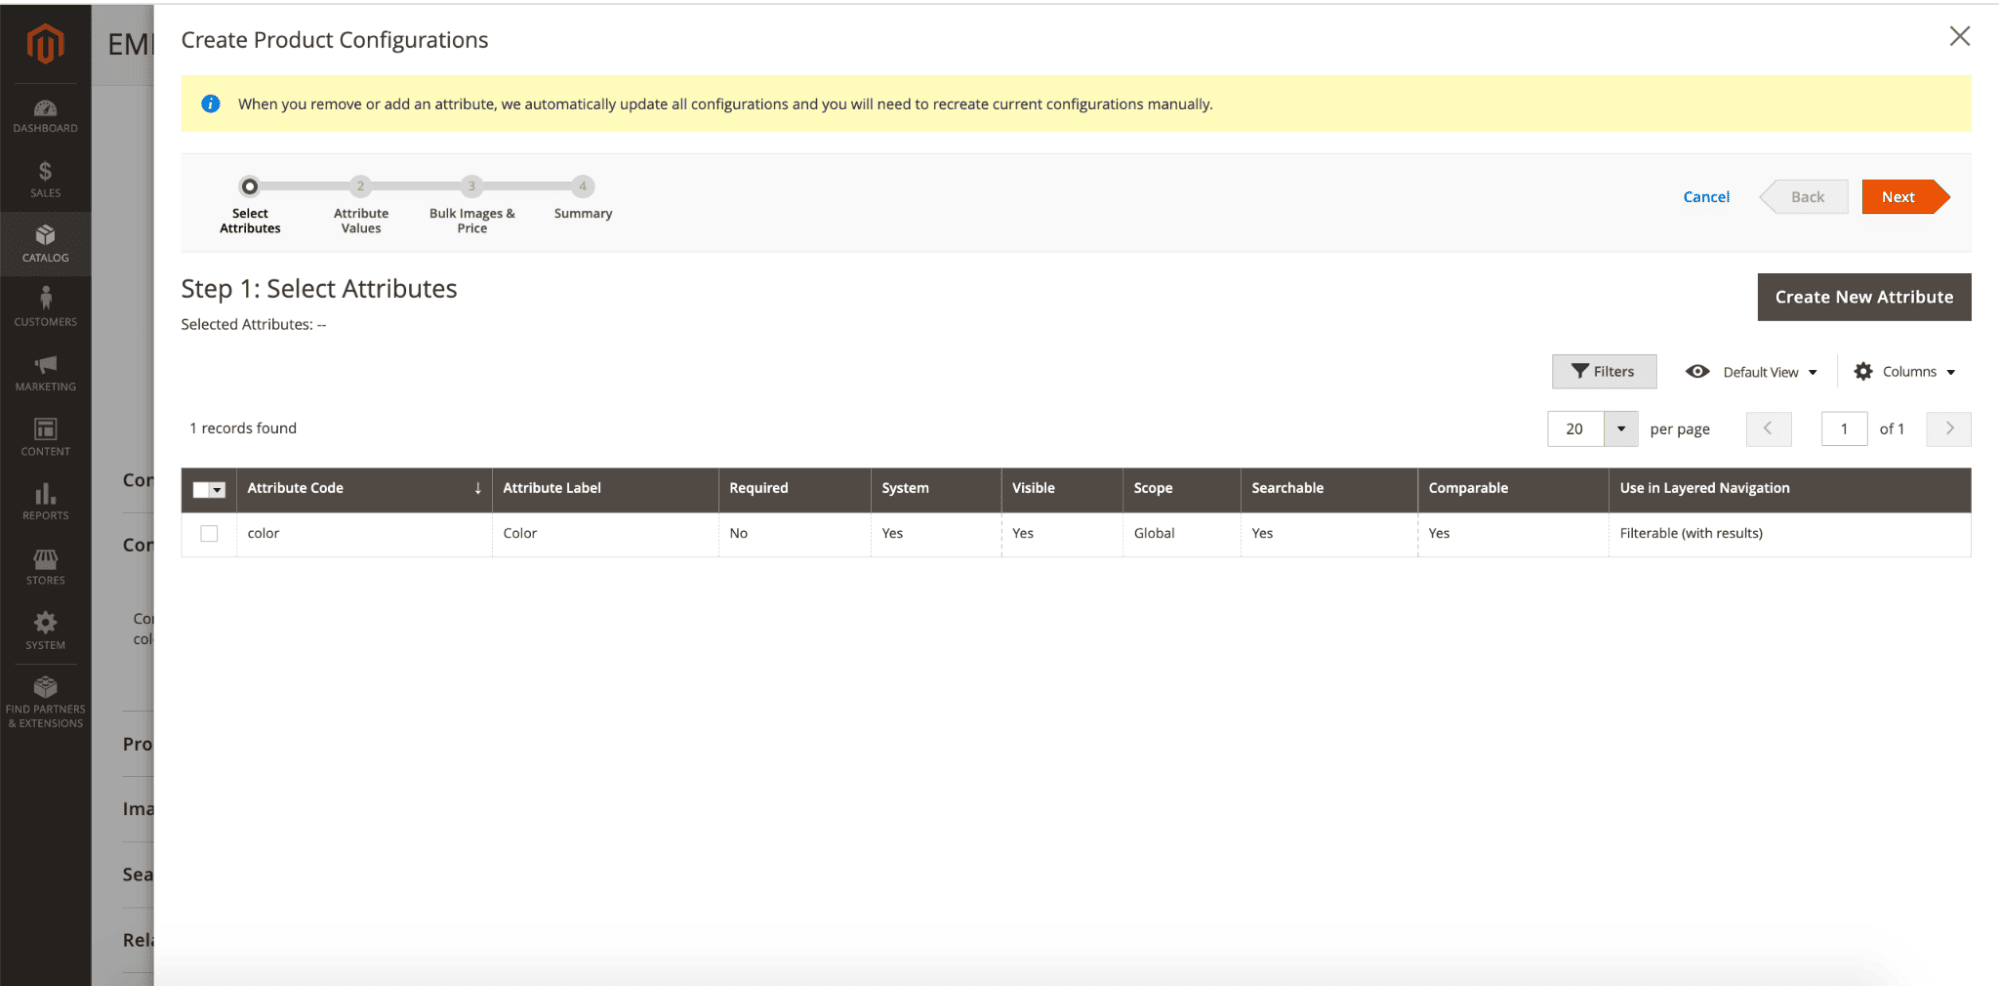
Each attribute represents a Cylindo feature, and the options of each attribute are the options of the Cylindo products.
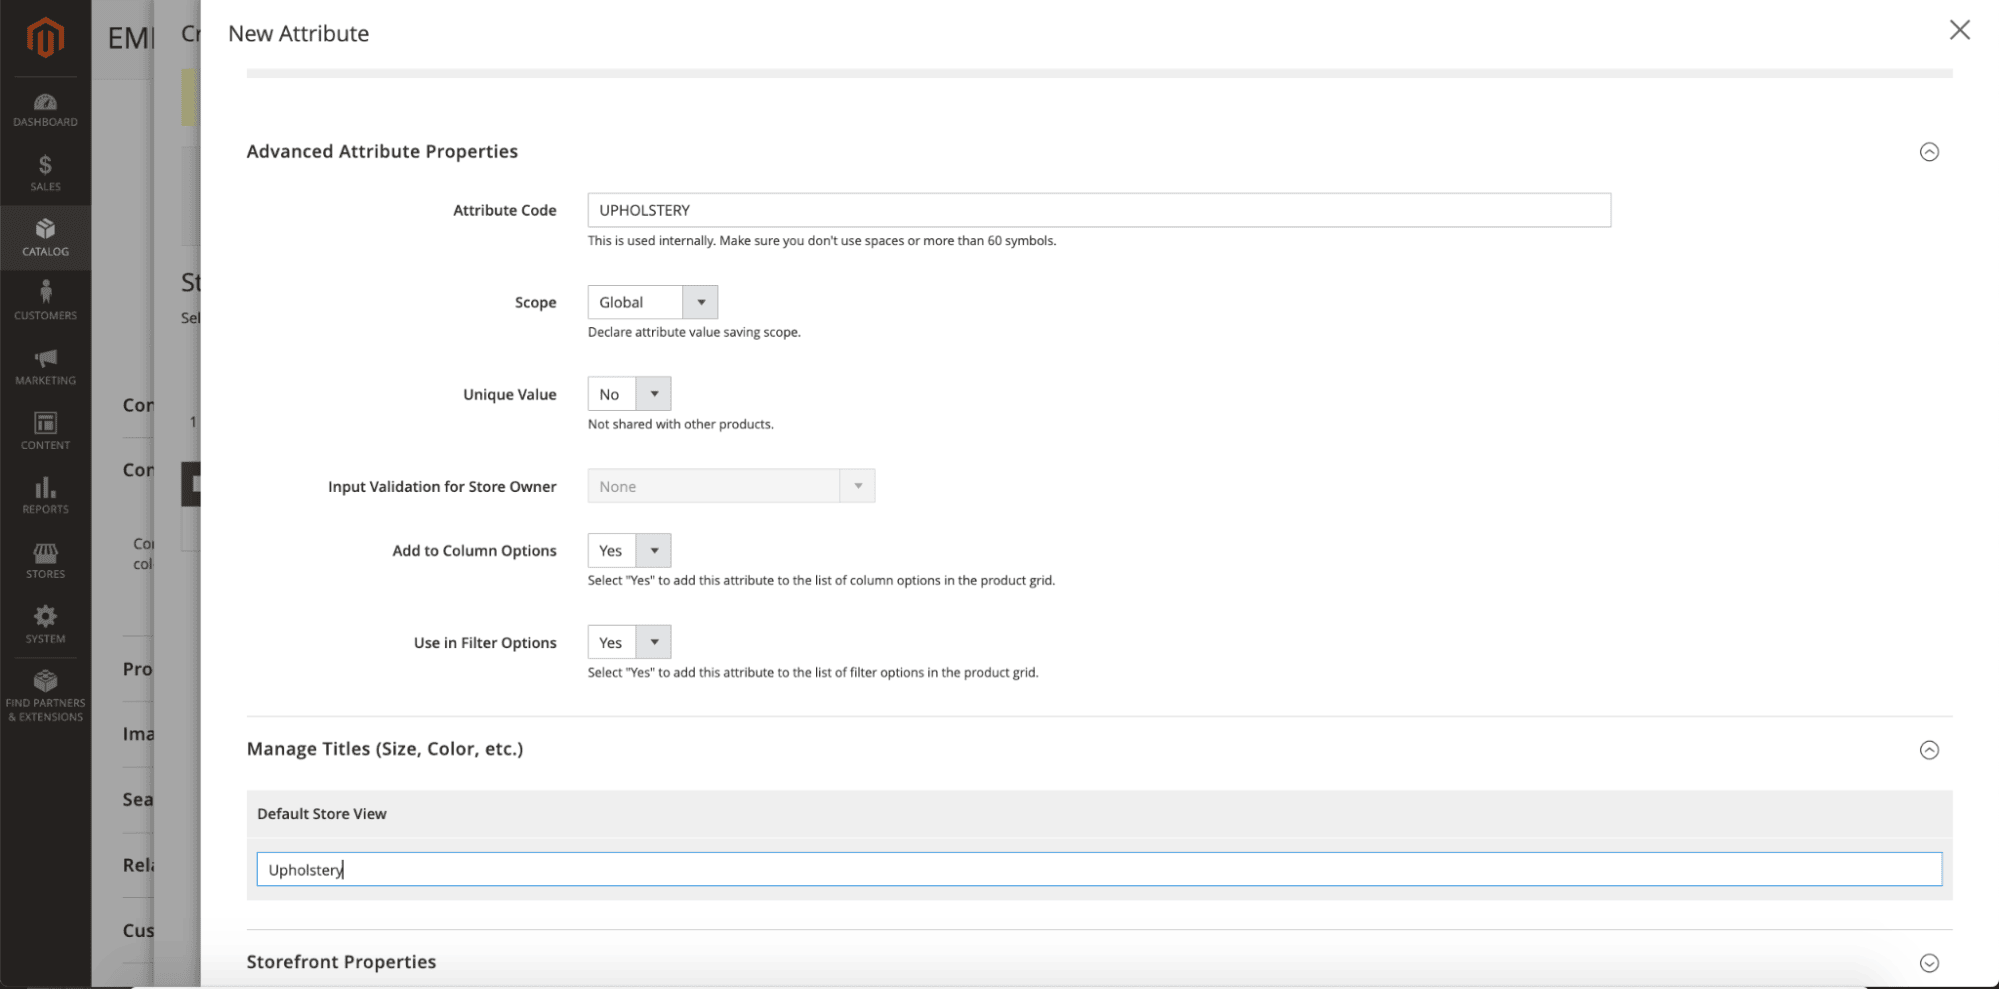
So here we've to fill the attribute option with the Cylindo information. For the Default label and Attribute code, we will use the feature Name and Code, respectively, and for each option, we'll use the Option code to fill the Admin field and the Option name to set the Default Store View field. The below two images show the configuration for the Upholstery.
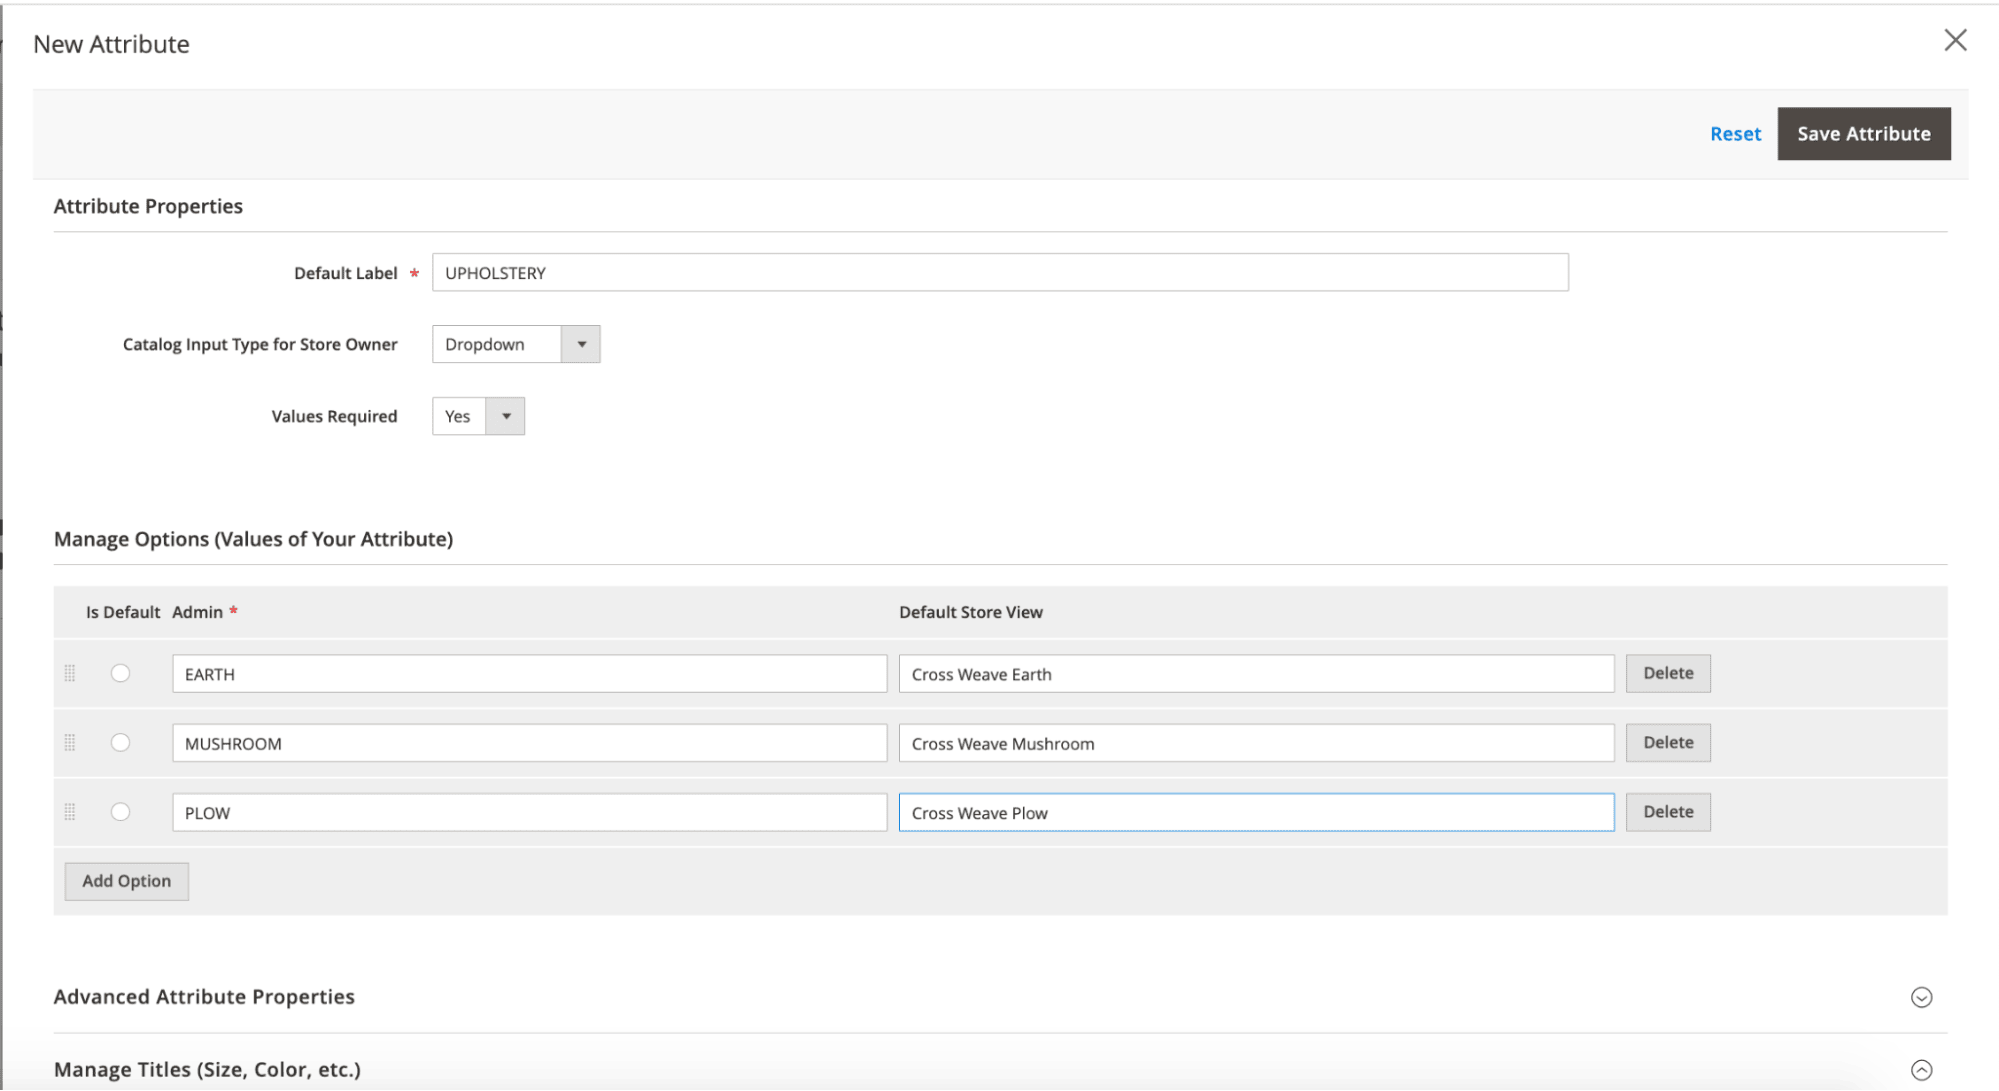
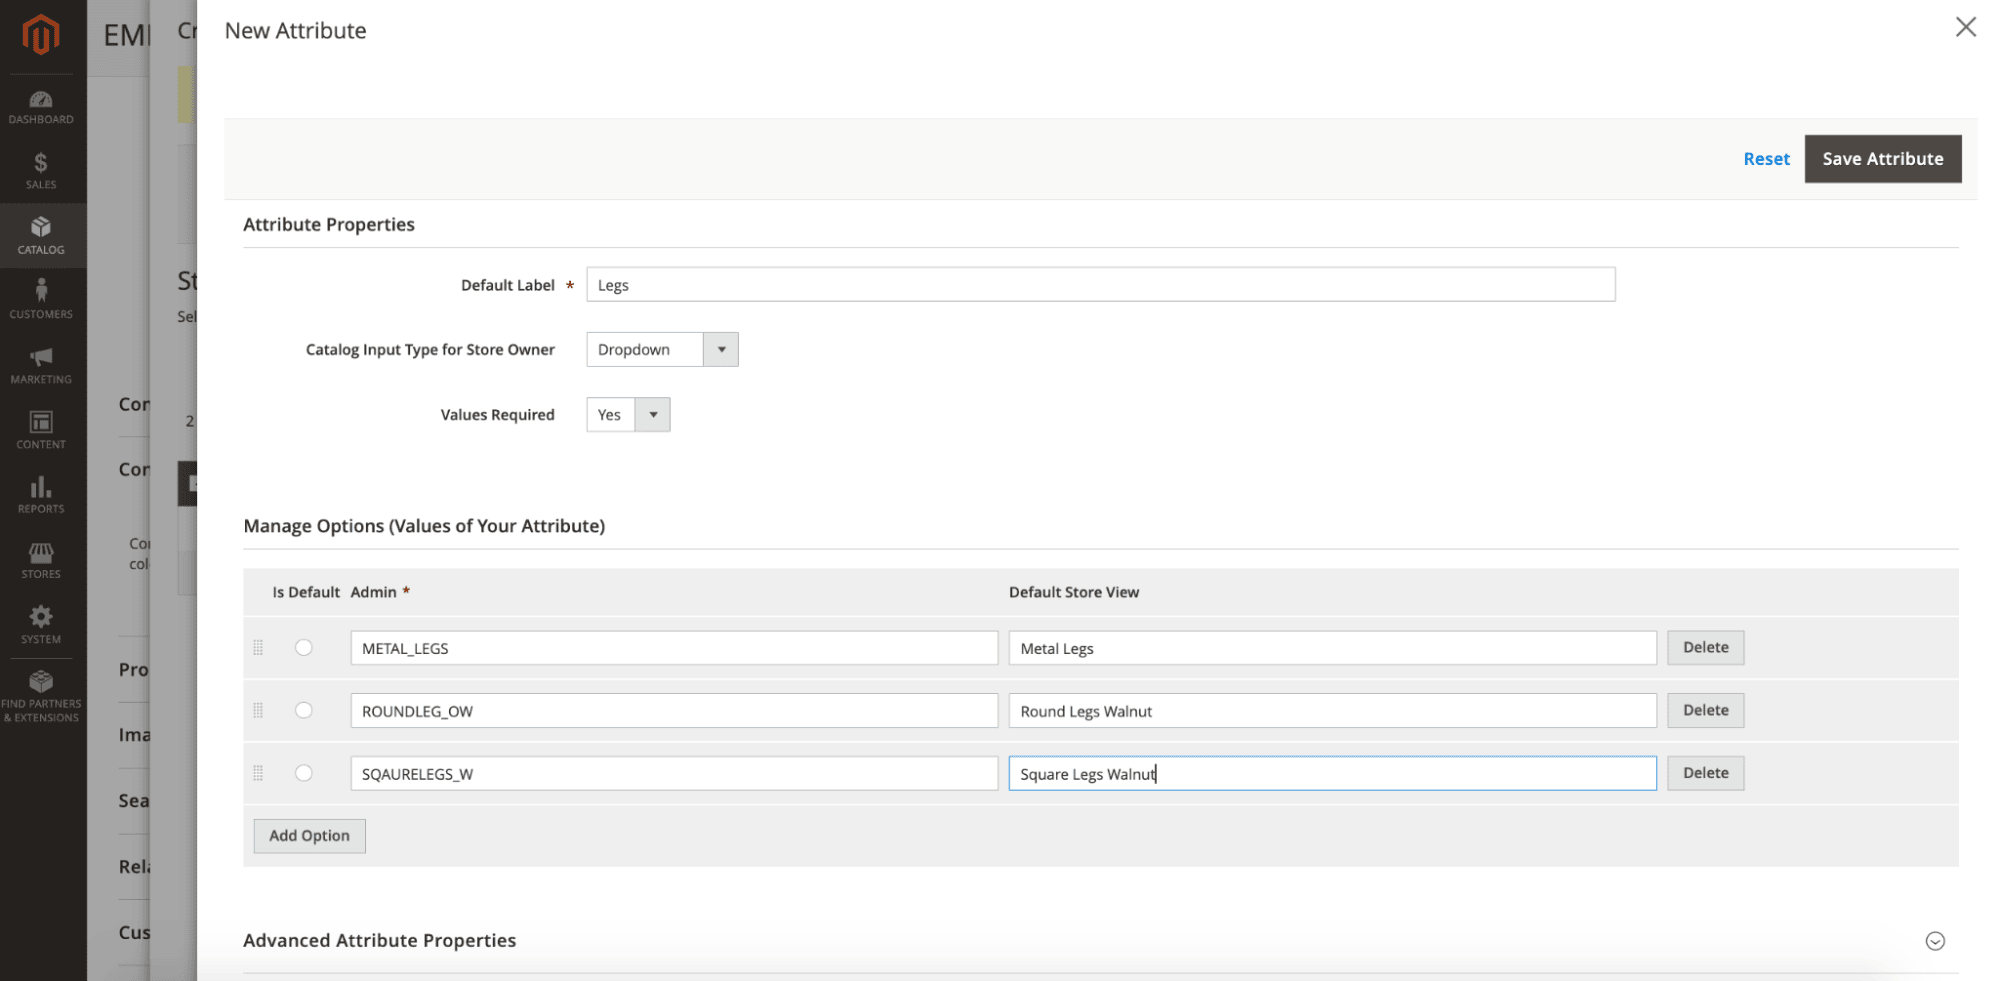
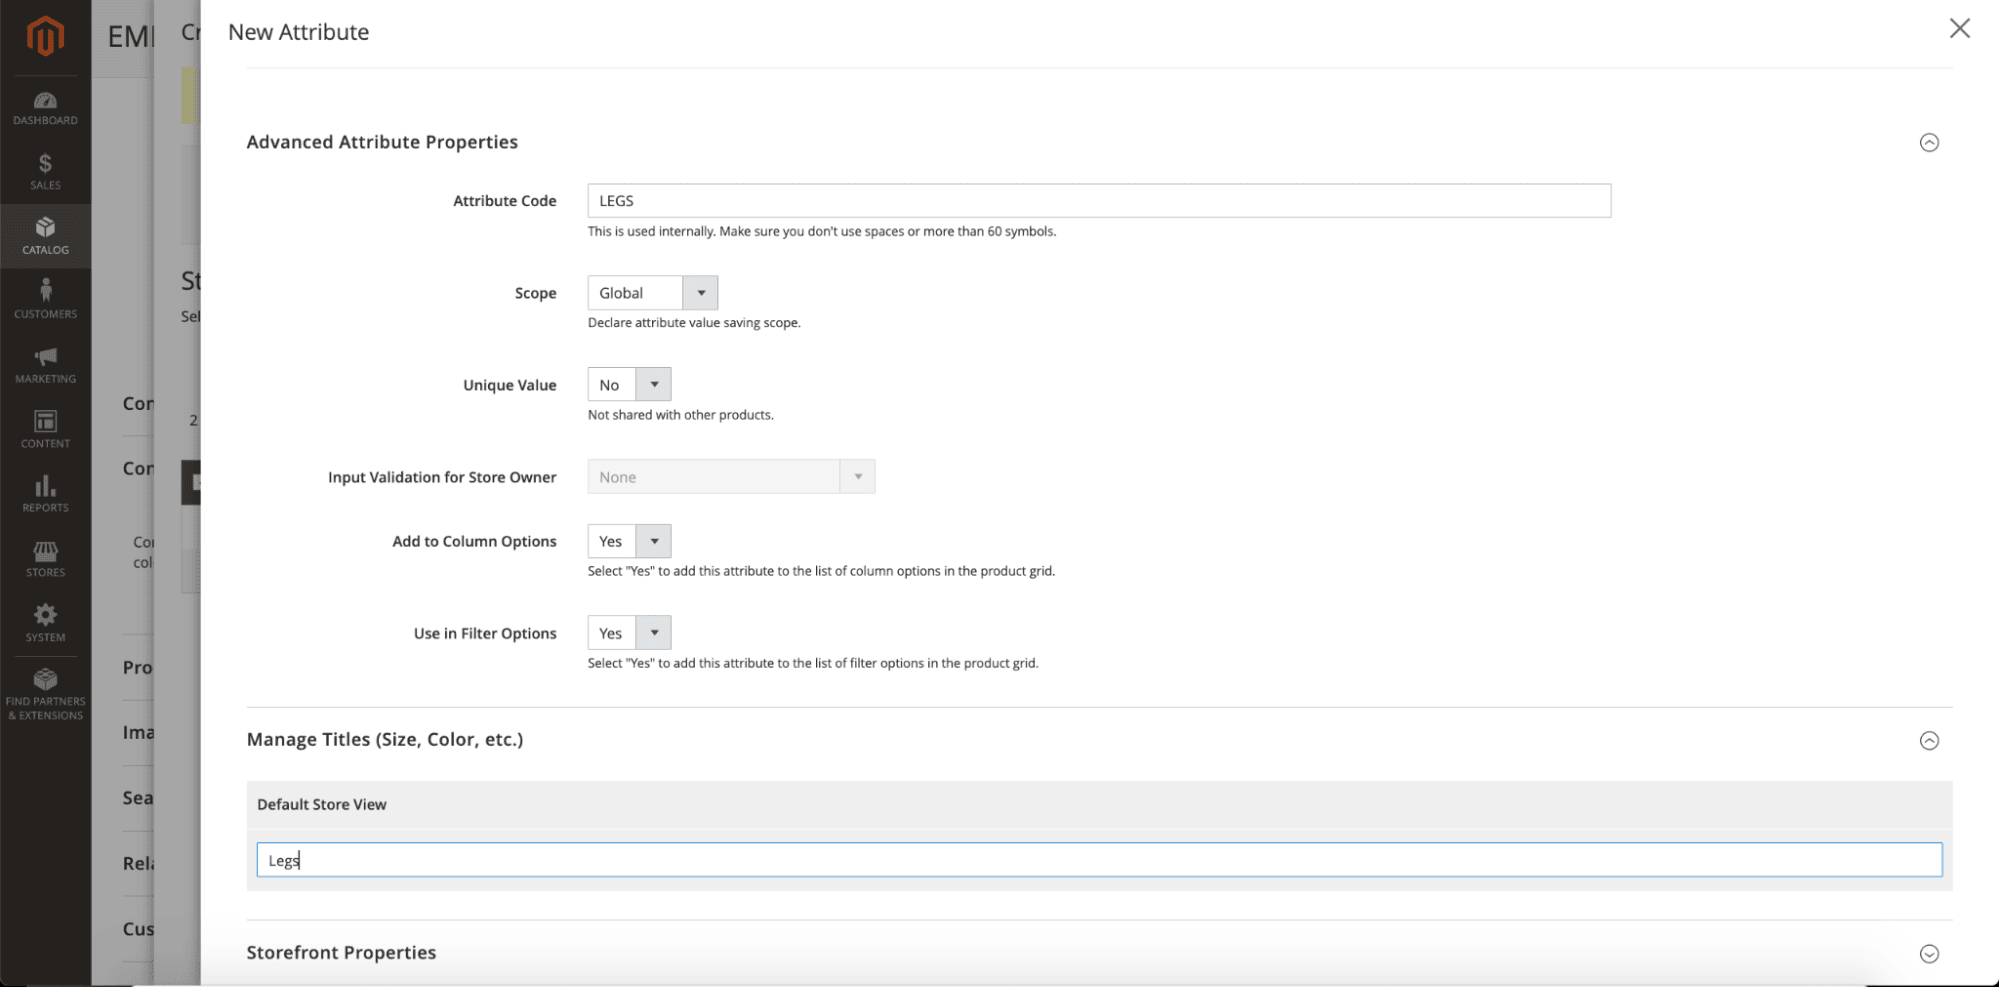
And these two images show the configuration for the Legs.
When both Attributes (Features) are ready, the next step is to save them and select them from the attributes list to continue creating the possible combinations.
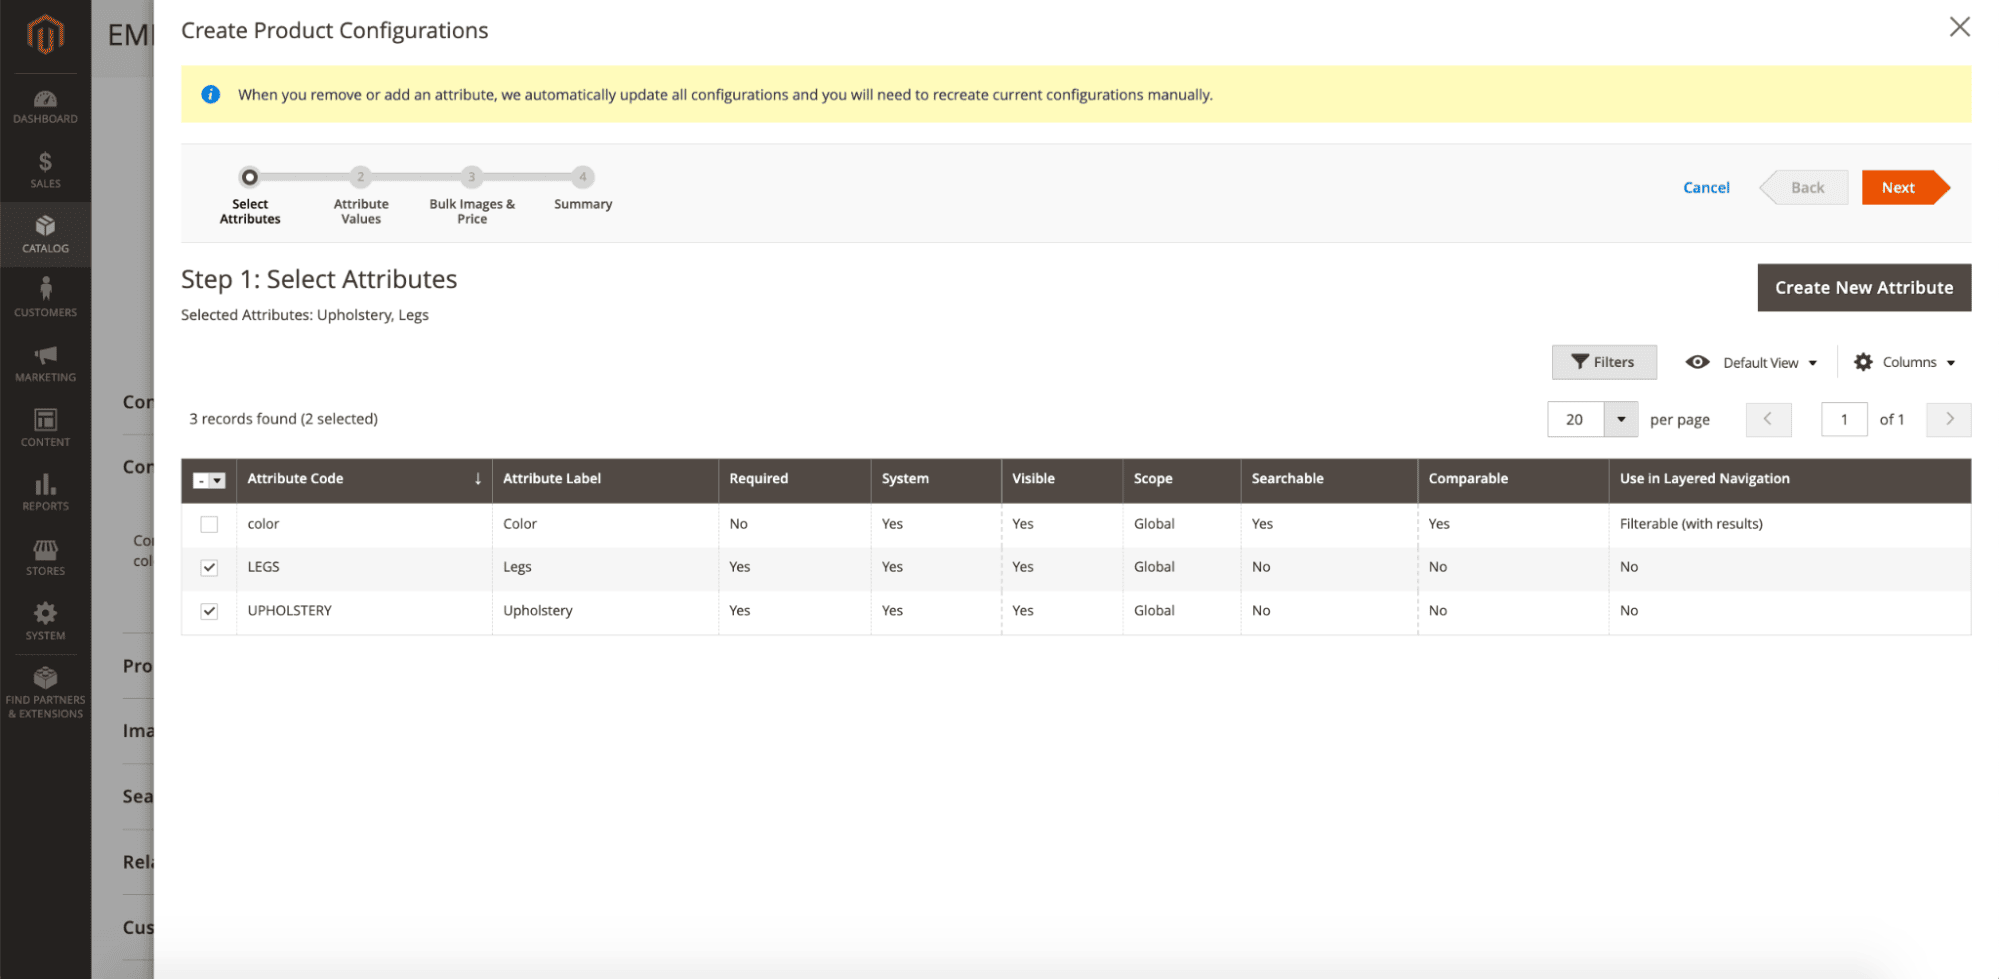
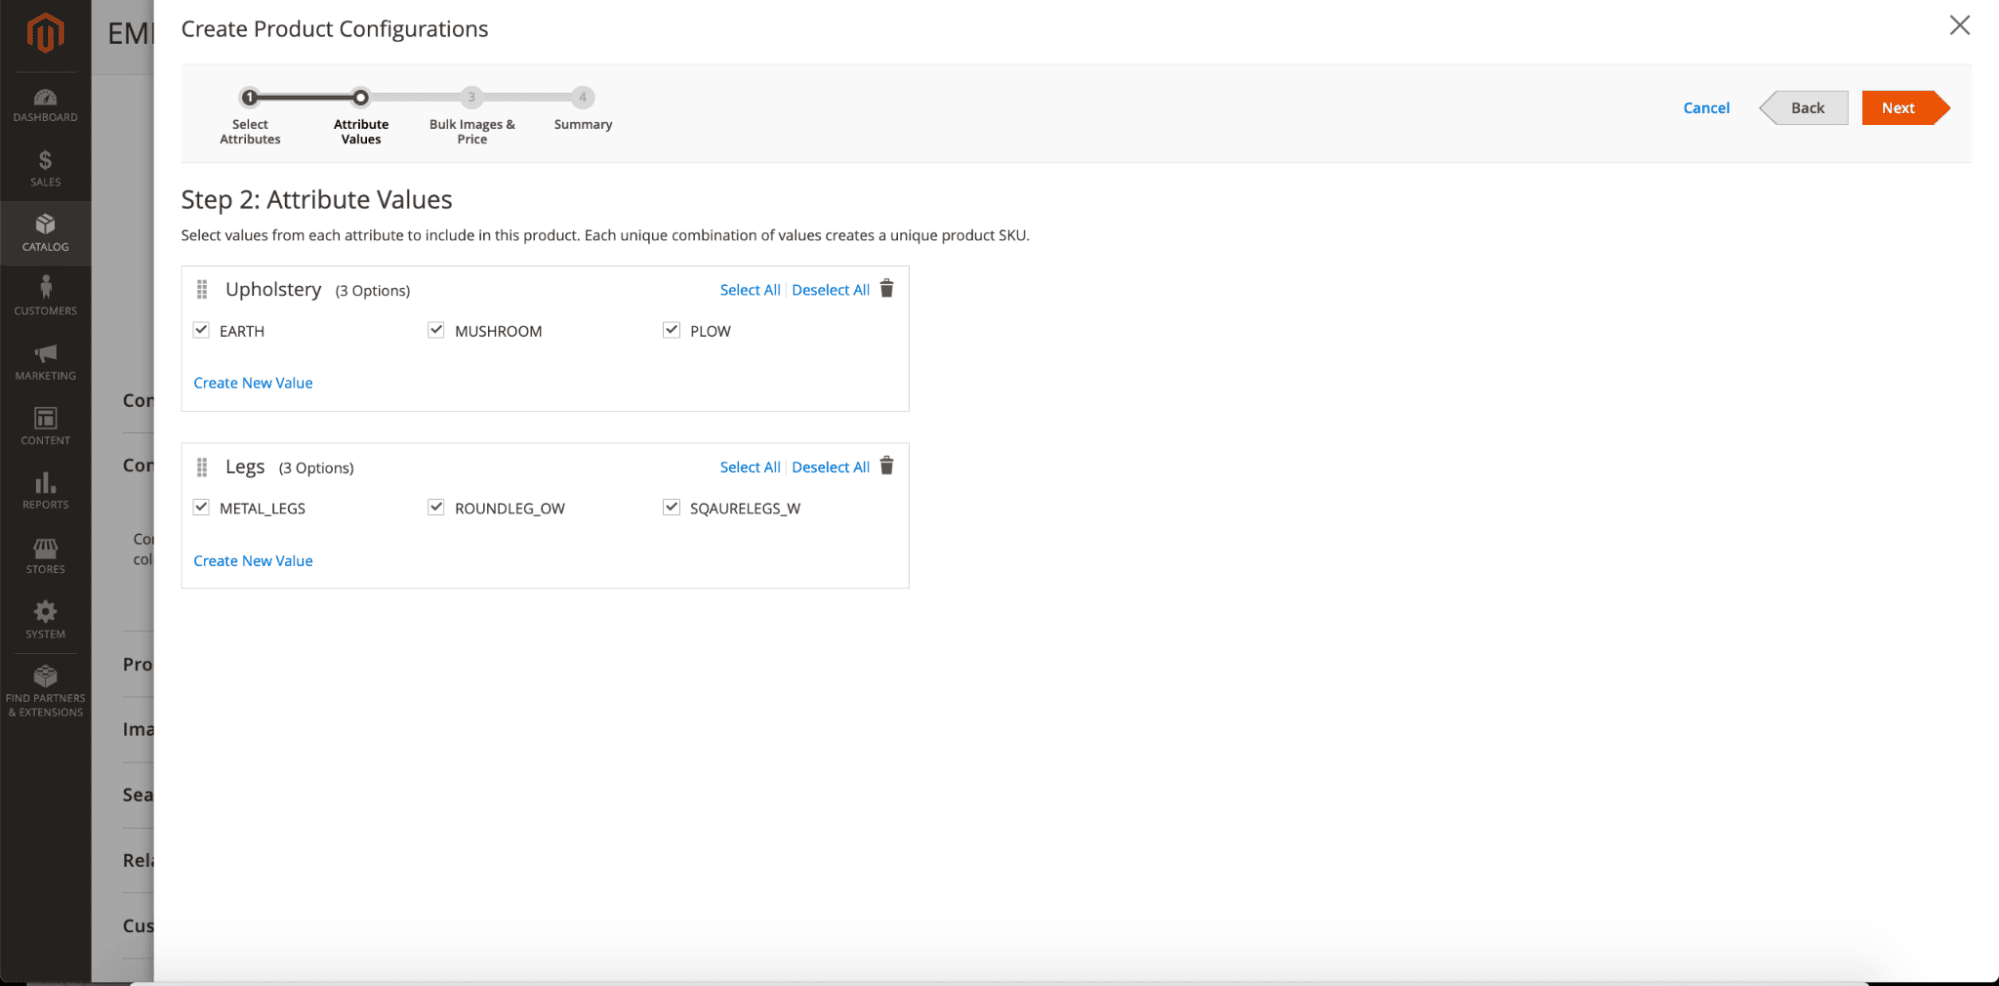
Only the features and options can sometimes create a combination for each case, so the following form allows us to define which attributes can be used together in the configuration panel. For this example, all the options should be selected, but they could change according to the product configuration.
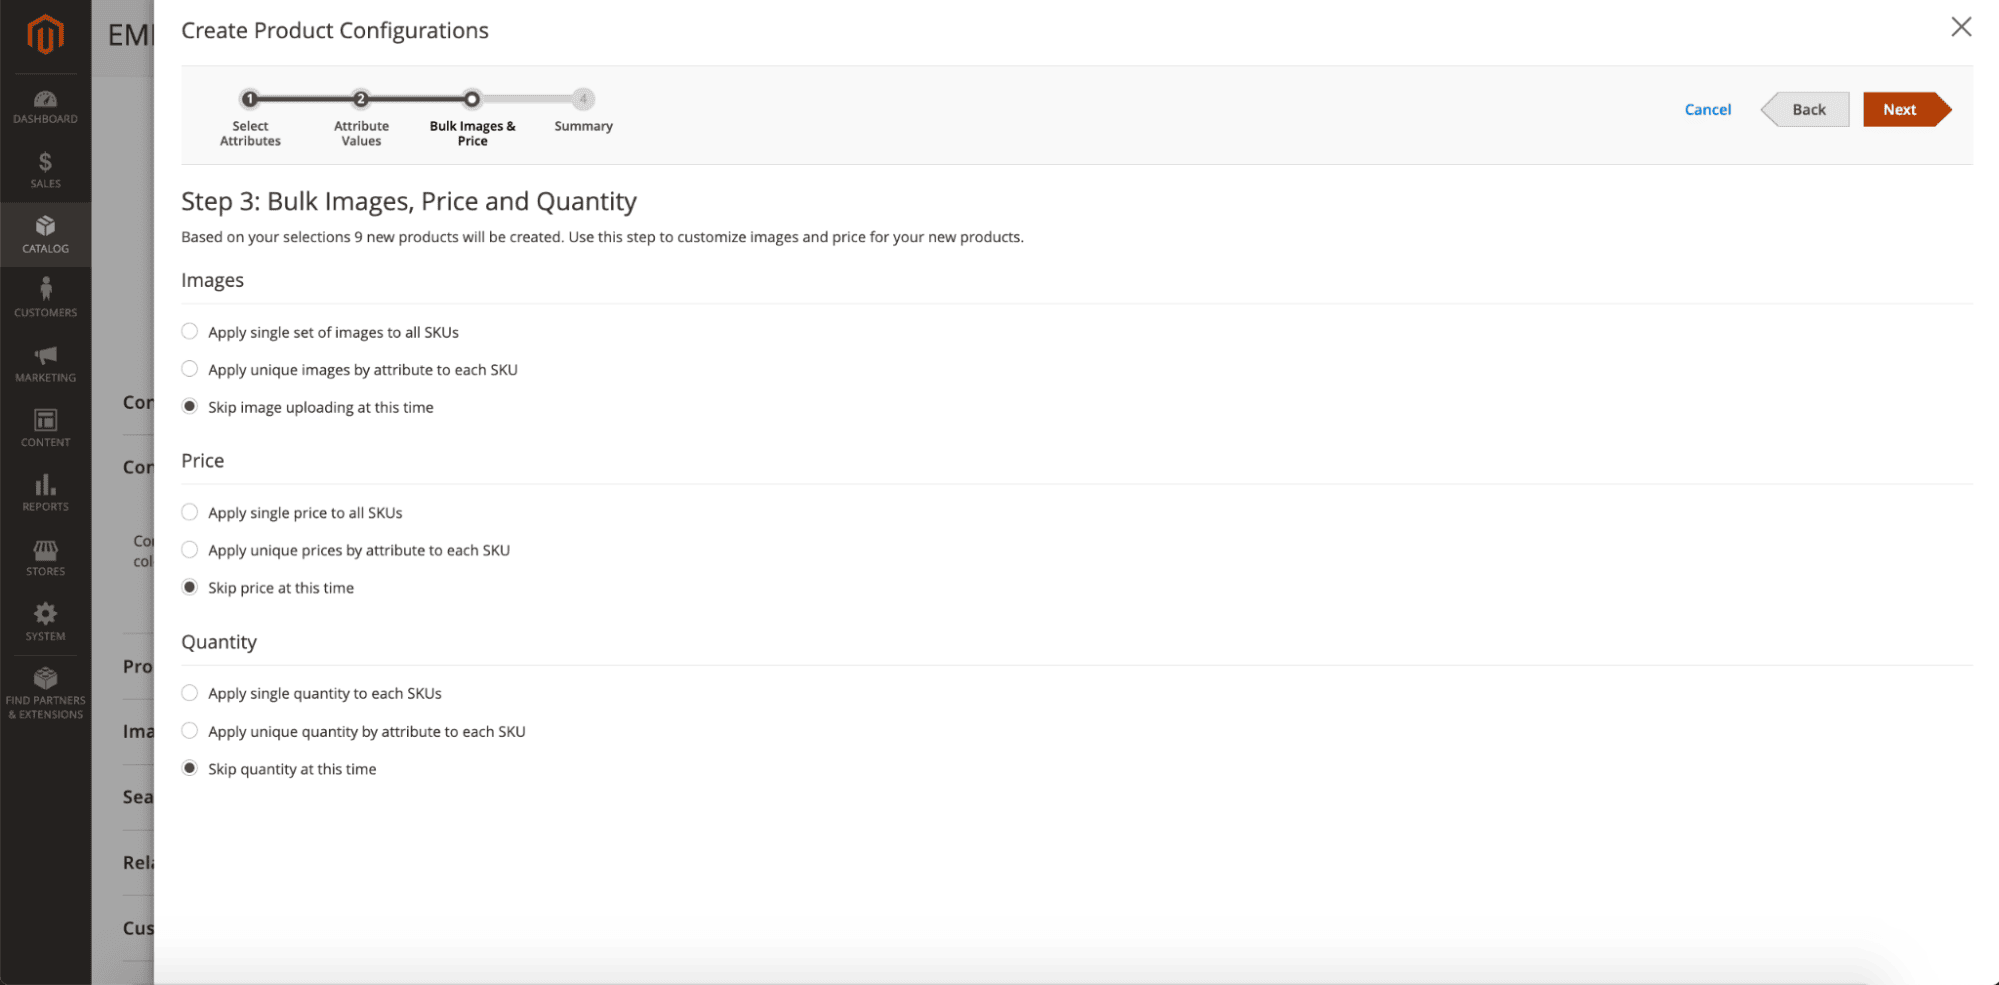
The following form requests an image for each configuration. Cylindo customers could set a fallback image to ensure something is displayed in case the 360 viewer fails while loading, but we are skipping this for this example. We are going directly to the following menu.
The last form shows an overview of the simple products that Magento is creating for each combination. In this previous form, when the Generate Products button is clicked, the combinations are made and displayed in the Configurations section of the Configurable Product.
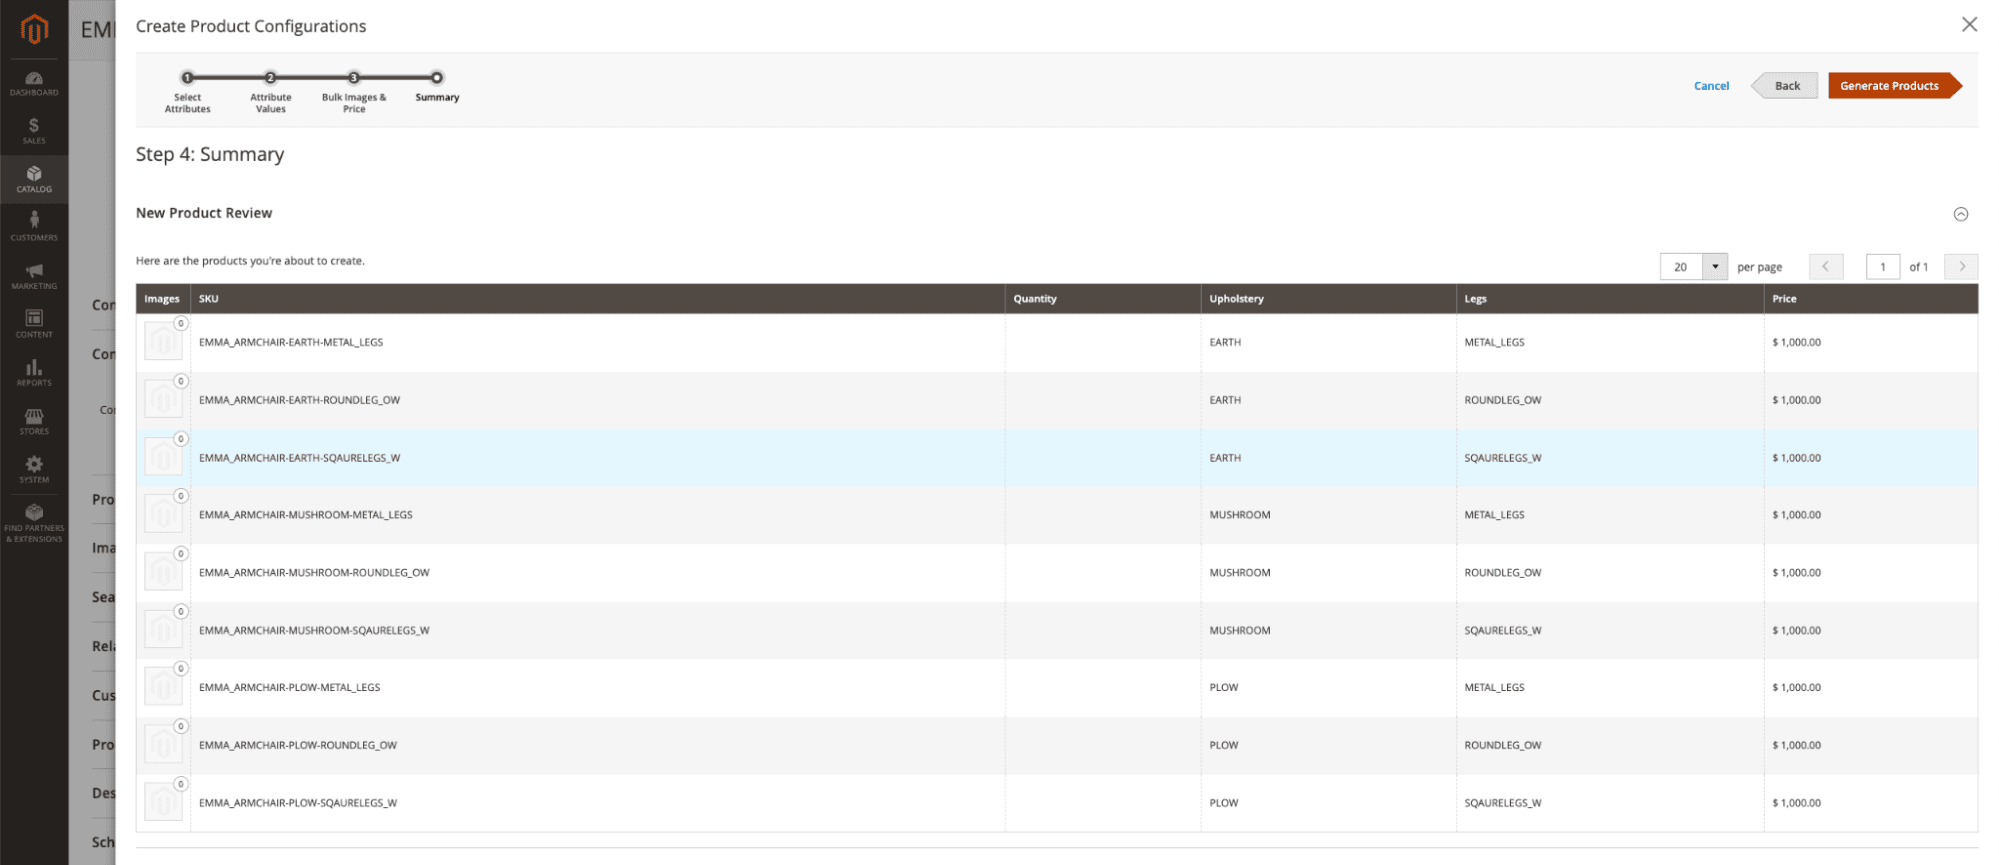
This image shows the resultant list. Please notice that some information related to the product quantity still needs to be included.
In case more guidance is needed to fill the items that were not configured in this tutorial, such as prices for each simple product, quantity, etc., the complete information can be found here.
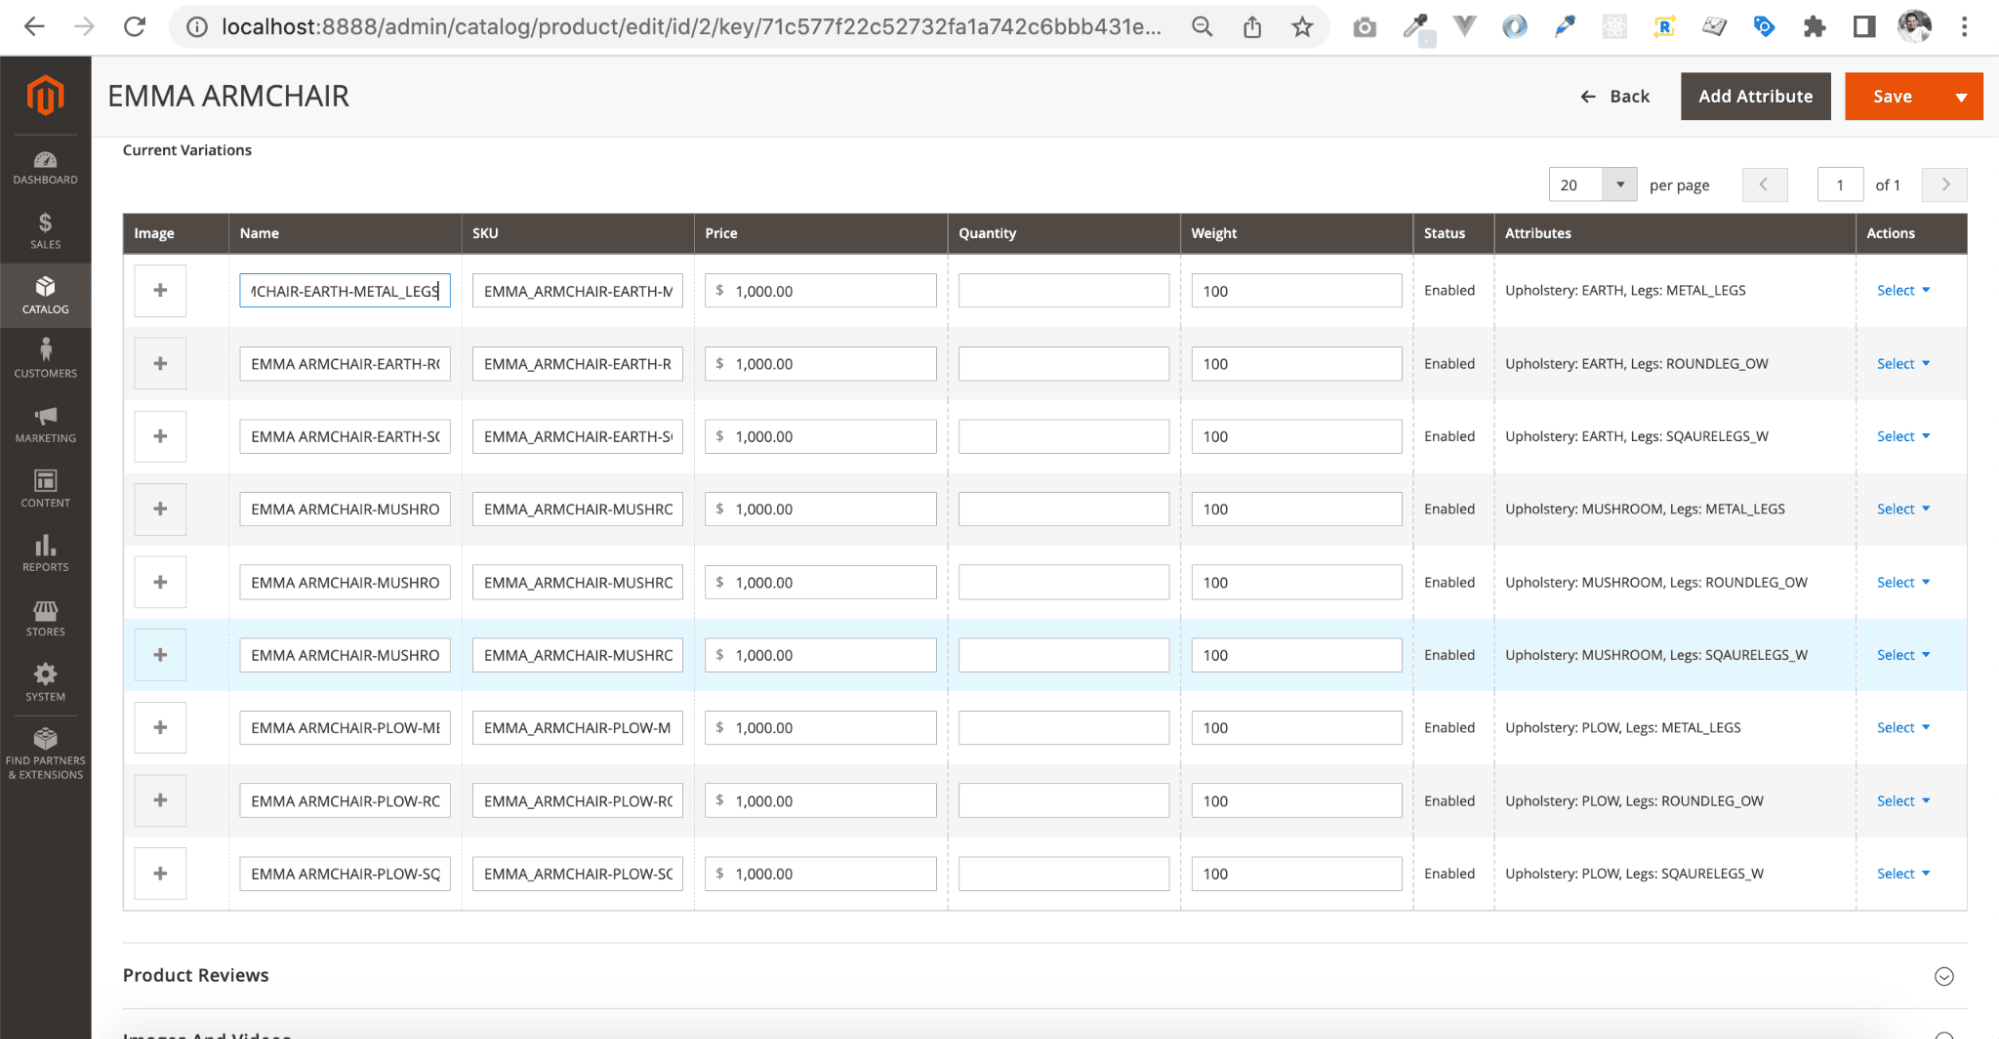
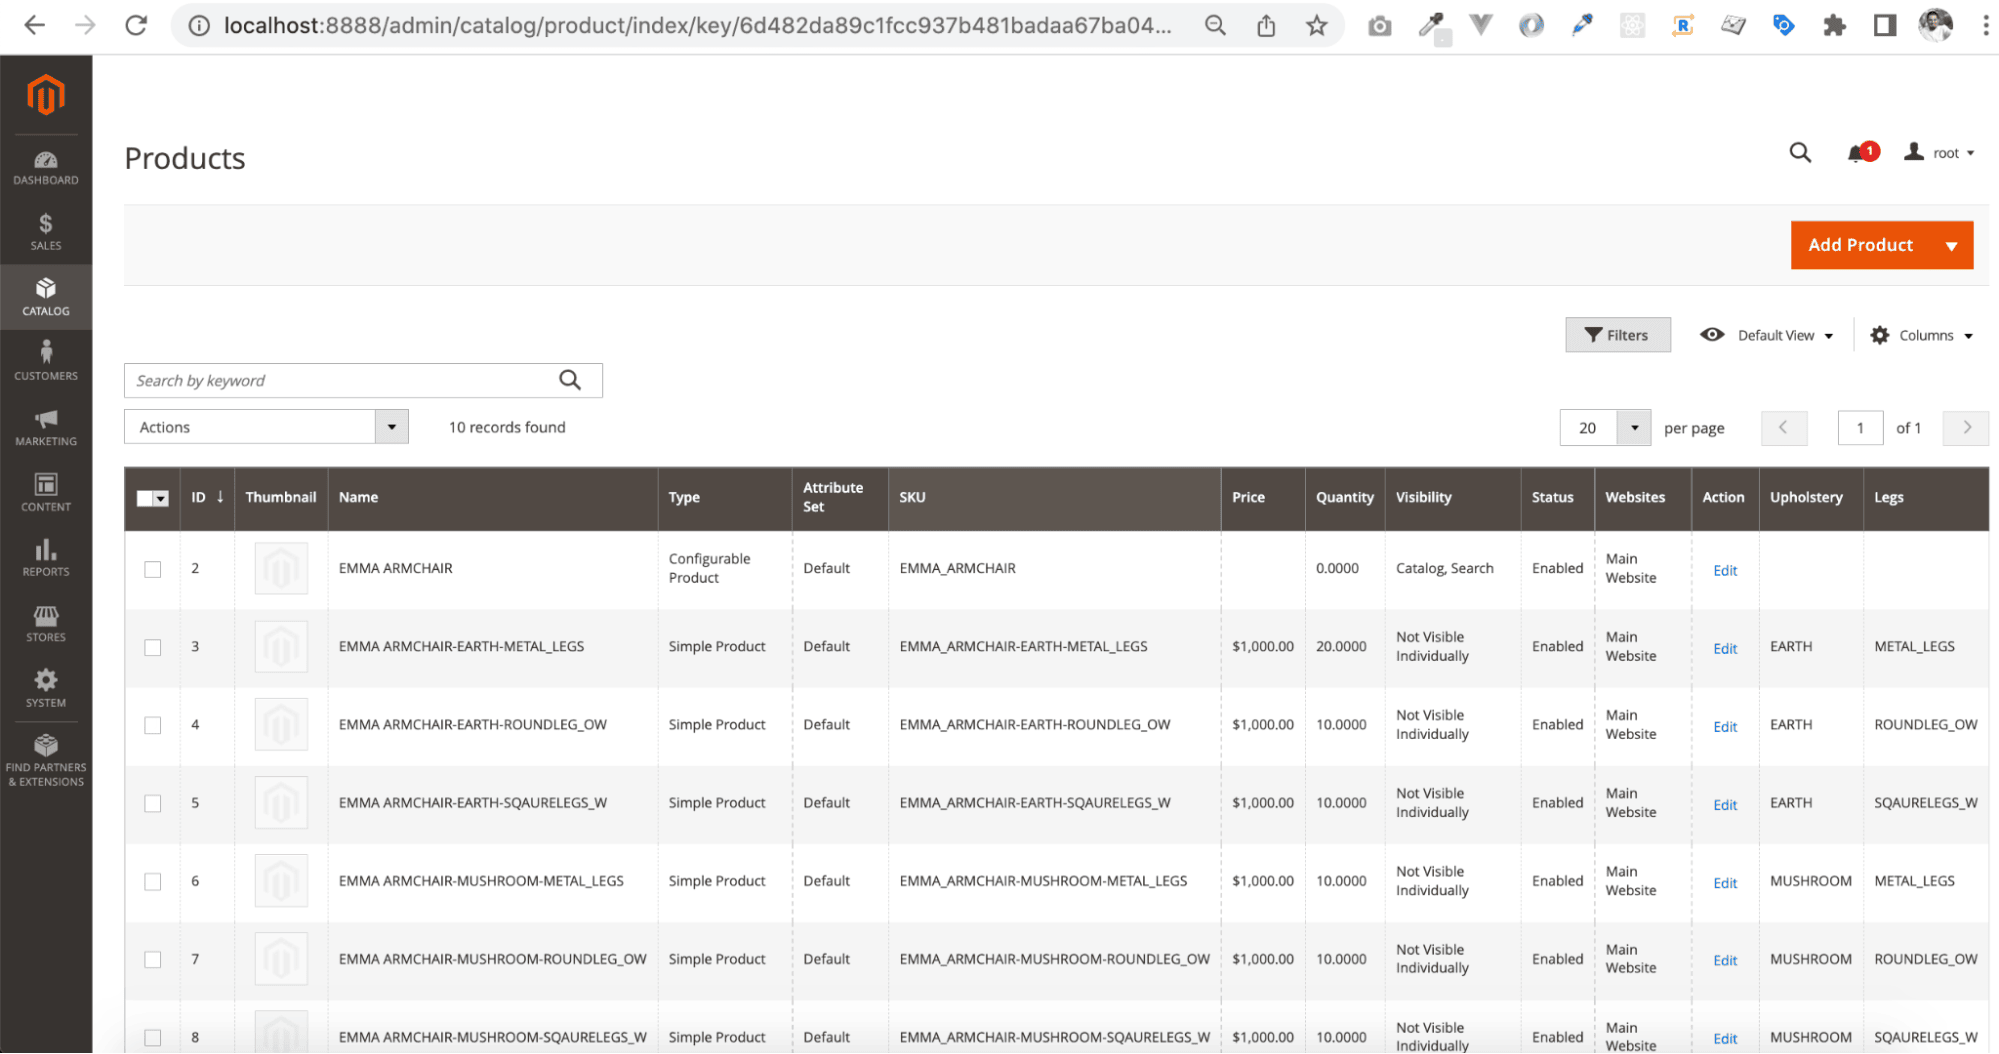
Once the configurable product is saved, the resultant simple products are listed in the products list as displayed in the next image
Viewer 5 implementation
Introduction
Once we have the structure of our configurable product ready in Magento, the next step is to ensure that the information we've stored in the Magento2 platform and the Cylindo CMS is synchronized.
It means the same codes for the SKU, Attributes, and Options of Magento need to exist in the Cylindo CMS.
To validate this, we first need to understand the product structure in both platforms, Magento and Cylindo.
In Cylindo, an SKU is named Product, and its Product Code identifies it. The product attributes are called features, and the options of the attributes are also named options in the Cylindo platform.
It is also worth mentioning that In Magento2, a Configurable product is a complex product created by Simple products. Each variation is a Simple product with its SKU, description, price, etc.
In Cylindo, the variations of a configurable product are handled differently. In Cylindo, only one Product is created, and the variations are requested through the Features and Options, not by a specific SKU or Product code. So, a particular combination must be displayed through the Cylindo products, such as Content API or Viewer 5. In that case, the Option for each Feature needs to be passed through the APIs to get the desired variation.
So, for example, if a configurable product named ARMCHAIR is created in Magento 2 and has one option named UPHOLSTERY with two possible values, YELLOW and BLUE, Magento creates three products defined by the SKUs ARMCHAIR, ARMCHAIR-YELLOW, and ARMCHAIR-BLUE.
In the Cylindo, the same product will be identified by the product code ARMCHAIR, and it would contain only one feature named UPHOLSTERY, and the options of this feature would be YELLOW and BLUE.
So, if the ARMCHAIR-YELLOW variation needs to be displayed, the feature and option UPHOLSTERY:YELLOW need to be passed through the Viewer API to display this product variation.
Implementation process
To implement Viewer 5 within Magento2, we need to modify the default Catalog module of Magento2 to add the new functionality required by Cylindo.
To achieve this, we'll need to install the Cylindo's core and then create a Block and a Template file to create the Cylindo logic that will be embedded in the PDP view through the XML file of the Catalog module. Please notice that due to the version of Magento that you've installed and the structure of your online store, part of the process could be different, but essentially this is the same process for all the implementations.
For Cylindo Viewer 4, the JS / CSS core files were downloaded through the block XLS model, but since Cylindo Curator core is an ES6 Module and Magento 2 doesn't support these kinds of files yet, we call them through the PHTML file as a workaround.
1. Create the Block Class
Create the file Cylindo.php within app/code/Magento/Catalog/Block/Ui/ it will store the Class with the Functions needed to display the viewer.
This Class retrieves the information needed to create and manage the viewer instance on the Product Detail Page. The information required to create the viewer 5 instances are the Account ID, Product Code, and Features and Options that will be mapped and linked to the configuration panel of the customer website.
The block file contains four functions:
getConfigurableProduct: This function retrieves the information of the configurable product.getAttributes: This function retrieves the information of the attributes of the configurable object.getAdminOptions: This function retrieves the option codes of the admin store. It is essential to mention that this function retrieves the option labels (codes) of the admin store instead of the labels of the store, in case you'vegetCylindoData: This function retrieves a JSON object with the information retrieved by the above functions.
The complete PHP class can be downloaded from this link.
2. Create the Template
Create the file cylindo.phtml within if the folder doesn't exist, it should be created app/code/Magento/Catalog/view/frontend/templates/product/view/
The template file is a phtml file where the information generated by the Block Class is received. This file is in charge of building the viewer 5 instances and also detecting the configuration panel changes to update the viewer instance's features.
Notice that in this version of the Cylindo Curator, we need to add the following URL links above the rest of the phtml file:
<link
  src="https://content.cylindo.com"
  rel="preconnect"
  type="url"
  crossorigin
/>
<script
  src="https://viewer-cdn.cylindo.com/v1/index.mjs"
  type="module"
  async=""
></script>
To learn more about the implementation of the viewer 5 instance, you can read more about it here.
The complete phtml file can be downloaded here.
3. Render the phtml file in the PDP
Open and modify the file catalog_product_view.xml from the folder app/code/Magento/Catalog/view/frontend/layout again to add the block in the PDP.
The piece of code below shows how to achieve this. For this case, we're indicating that we're adding a block within the content container using Cylindo's block and template.
<referenceContainer name=“content”>
      <block
      class=“Magento\Catalog\Block\Ui\Cylindo”
      name= "cylindo"
      as= "cylindo"
      template= "Magento_Catalog::product/view/cylindo.phtml"/>
  </referenceContainer>
The complete XML file can be downloaded here.
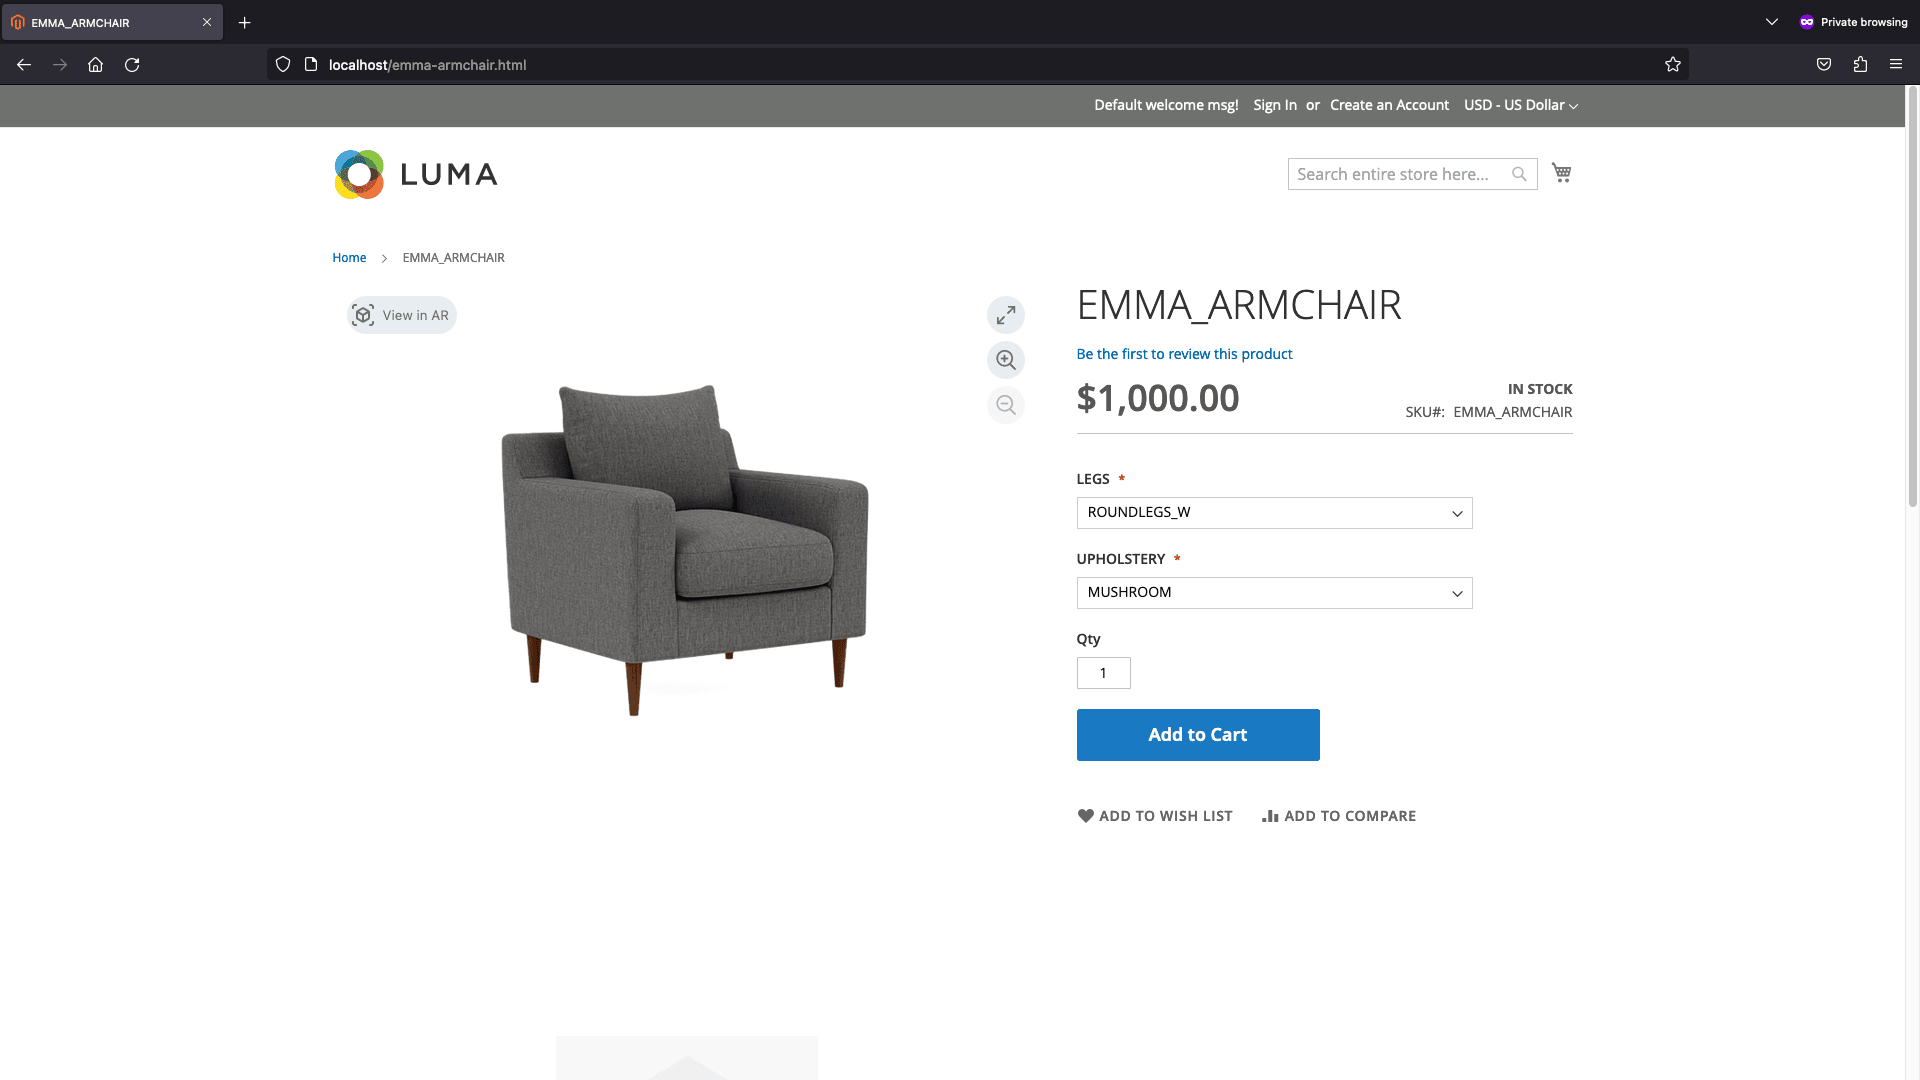
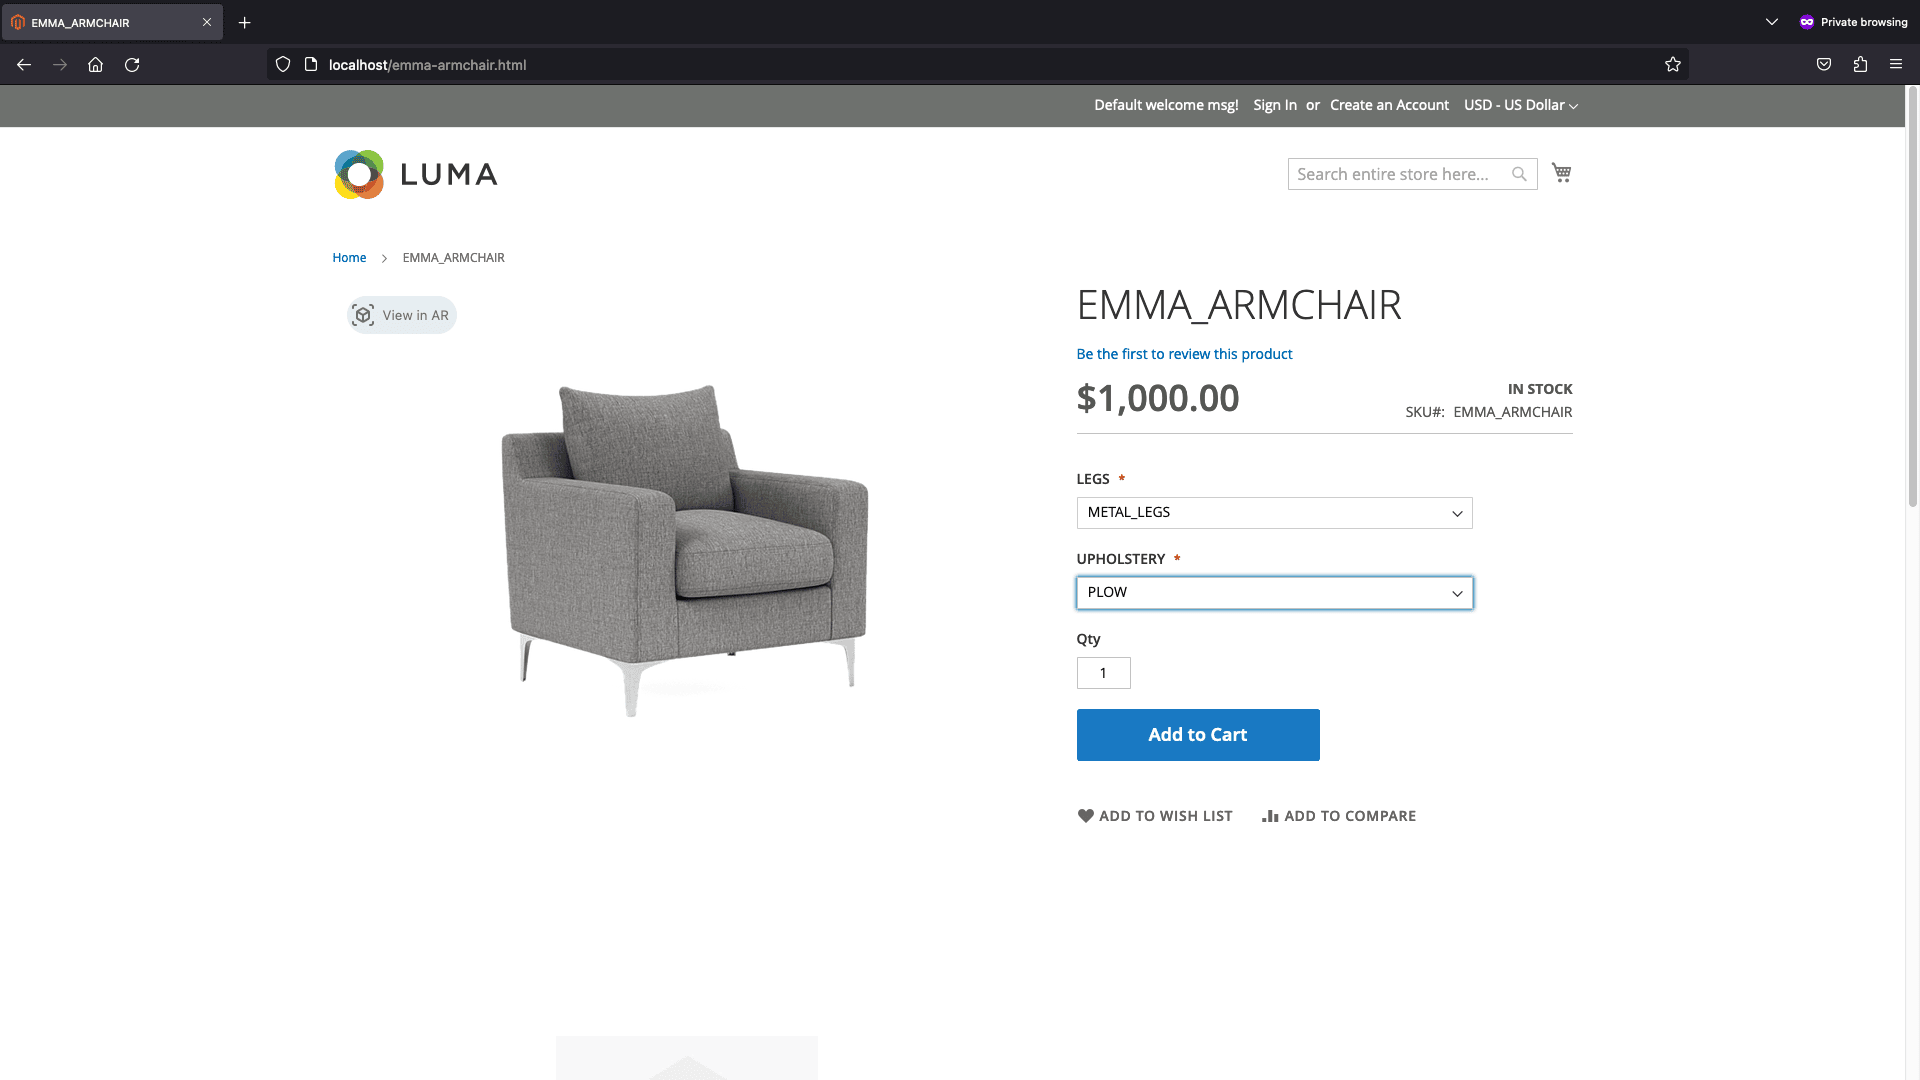
Once these files are added to your online store, and the cache of the Magento2 store is cleared, Viewer 5 should be displayed in the PDP of the customer's website.
The screenshot below shows the resultant view.