BigCommerce Implementation
In this guide we will implement the Cylindo 360 HD Viewer into a webshop running the BigCommerce platform.
But before we start the installation, it is important to start with some information about BigCommerce’s scope in terms of products, options and variations.
This is needed because by default BigCommerce uses a different structure than Cylindo to store product information.
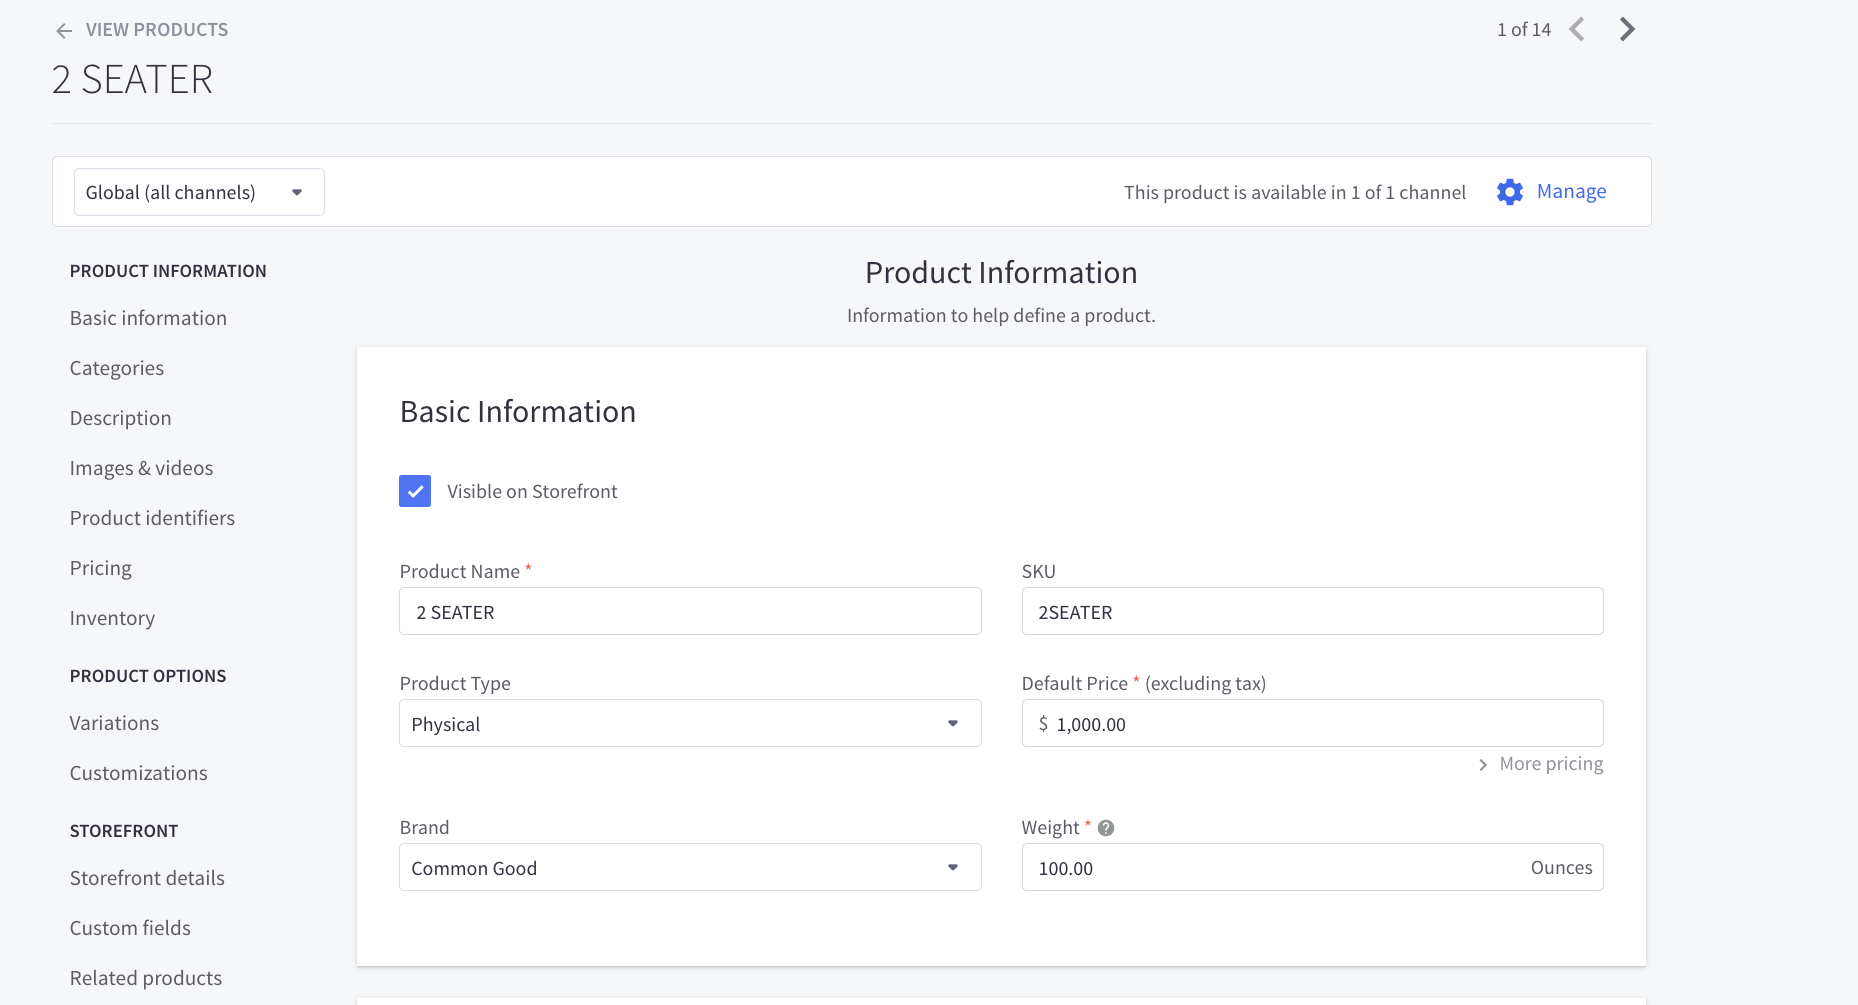
So let’s start with this article: it talks about Products and the fields available for them in the BigCommerce structure.
In BigCommerce, when a product is configured to have multiple options it generates a unique record and SKU per product. You can read more about it here.
At this point it is important to mention the first important difference between Cylindo and BigCommerce products.
While BigCommerce’s core generates a unique key for each variant, in Cylindo products have a unique product code for all possible combinations, Cylindo products do not handle unique IDs or SKU codes for each possible variant or combination. In Cylindo products, the variants are handled through feature types and options.
A feature type defines an attribute of the product that can be changed or customized. It could be Color, Upholstery, Legs/Frames, Arms, Headrest etc. And the options are all the possible values for each feature type, for example Wood Legs, Metal Legs, Plastic Legs etc.
By default, there is no space to store the codes needed by Cylindo for the product. In order to solve this, Cylindo customers have to use the BigCommerce values as codes as we explain below.
Use BigCommerce Options and Values (From Variations) to Configure Cylindo products
BigCommerce users can use the Variation data defined in BigCommerce to configure Cylindo products. This means that the tags used in BigCommerce to define Options and Values will be the same tags used to configure Feature and Option Names and Codes in the Cylindo CMS.
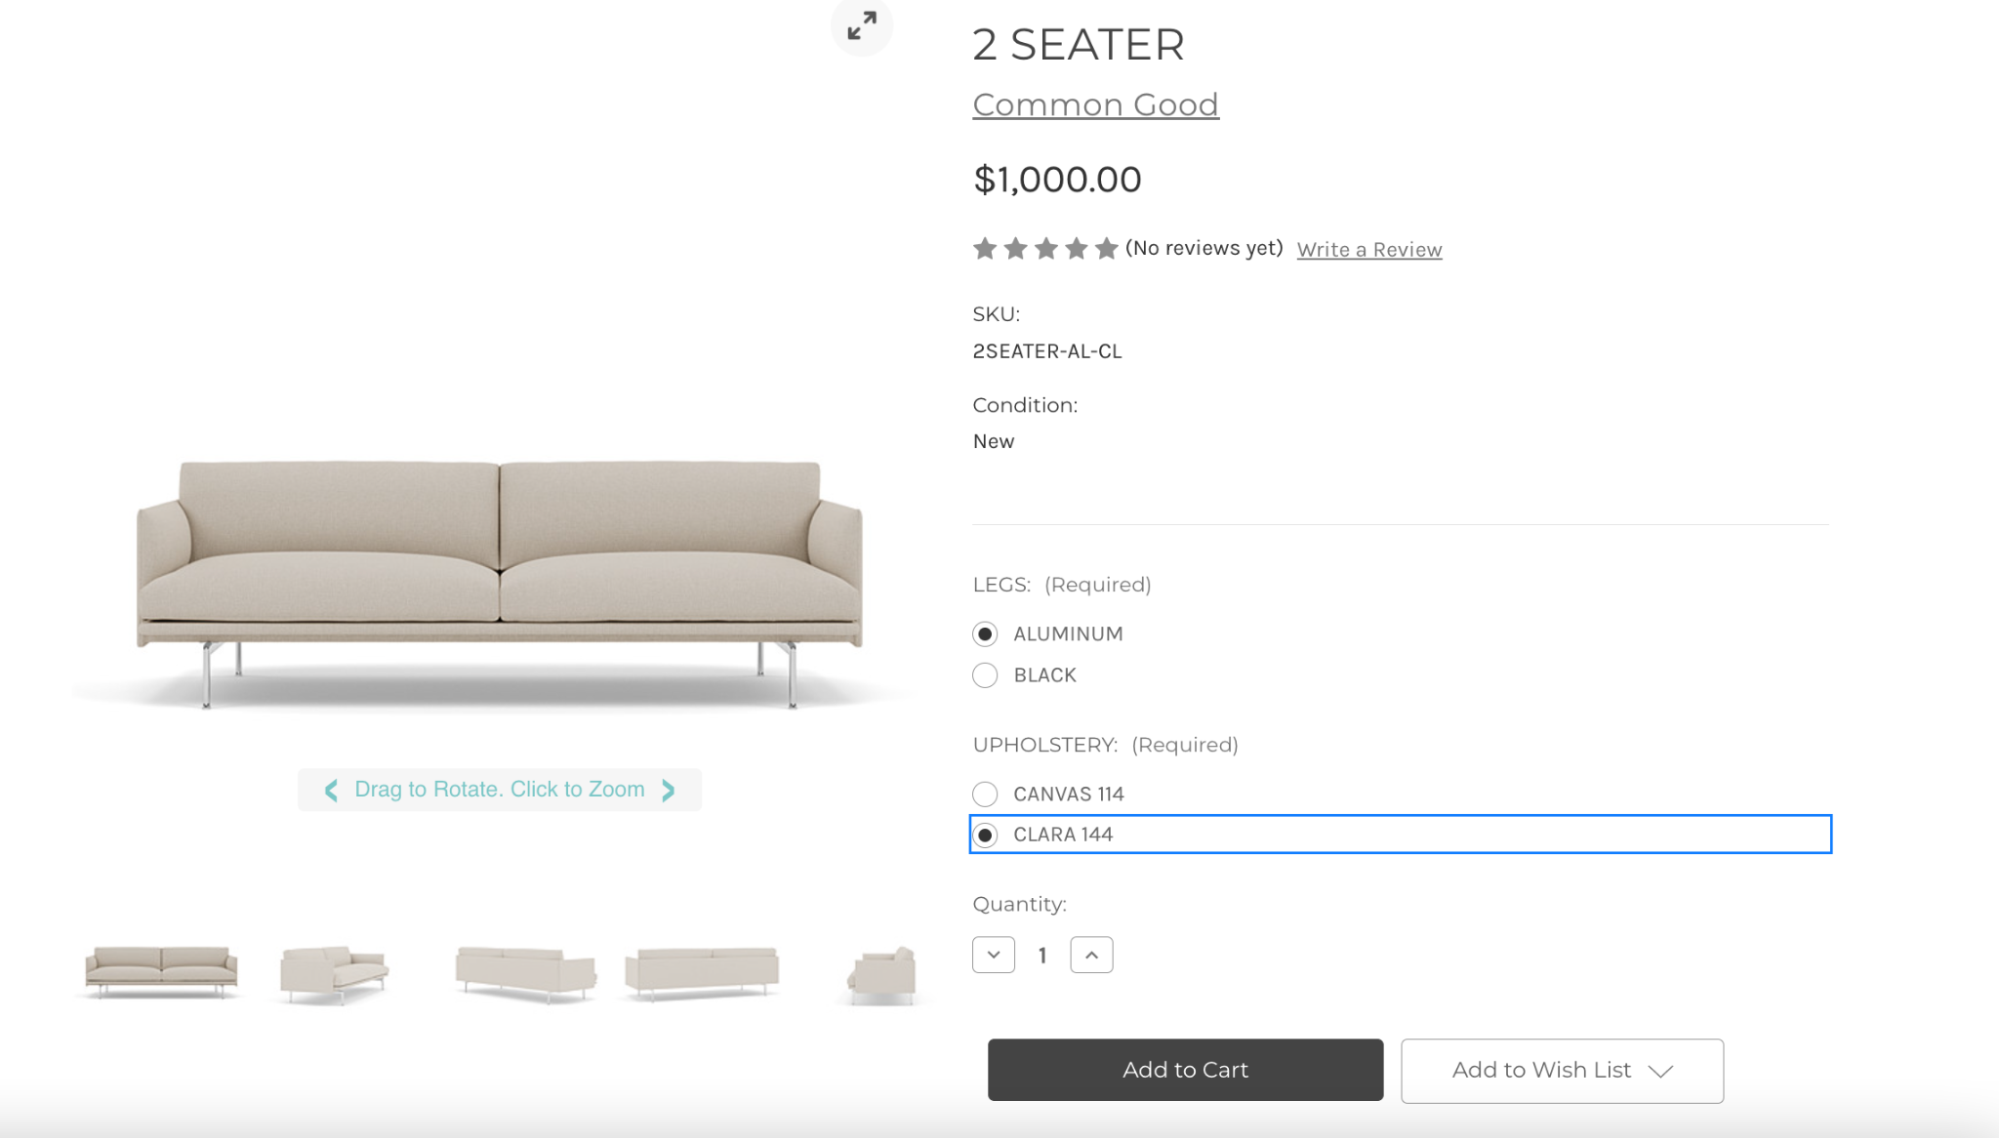
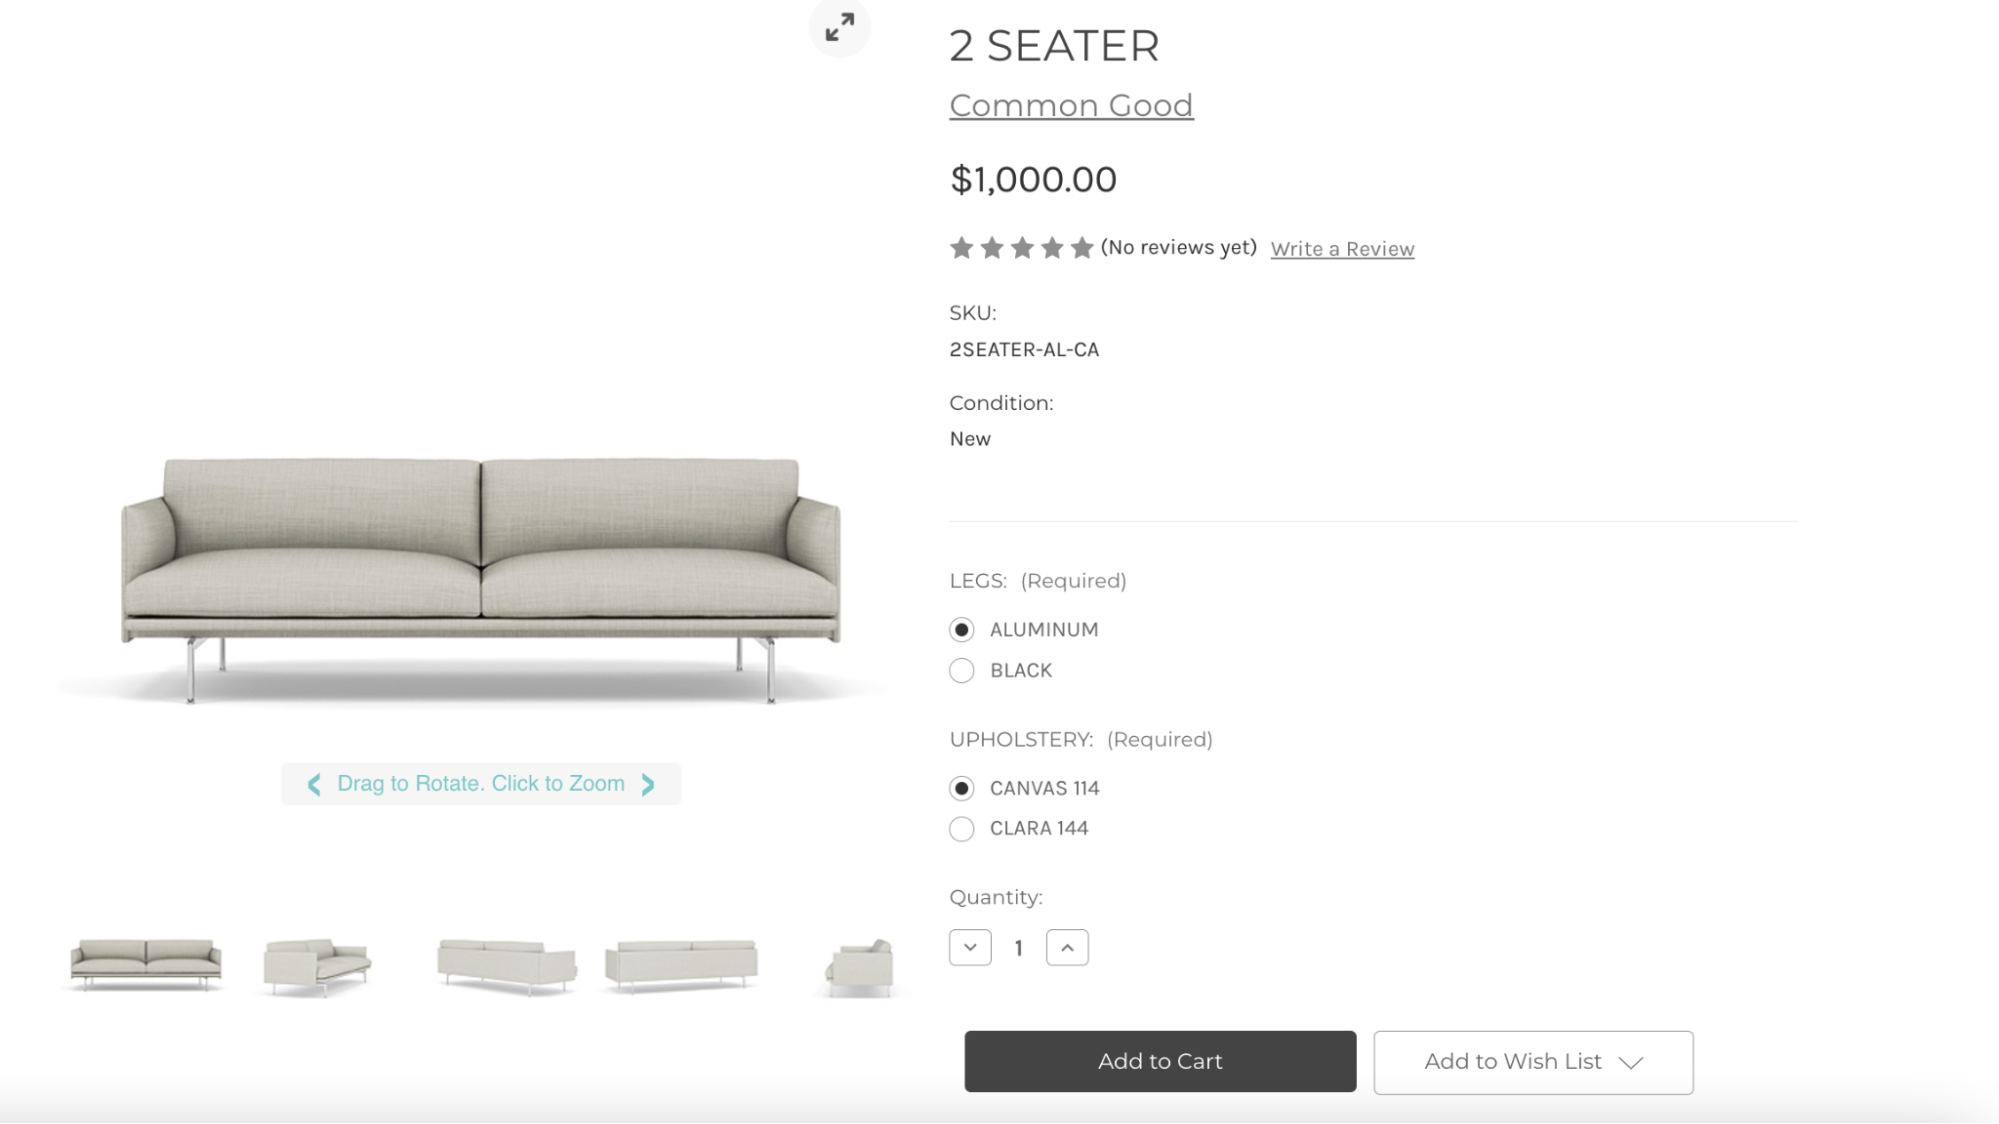
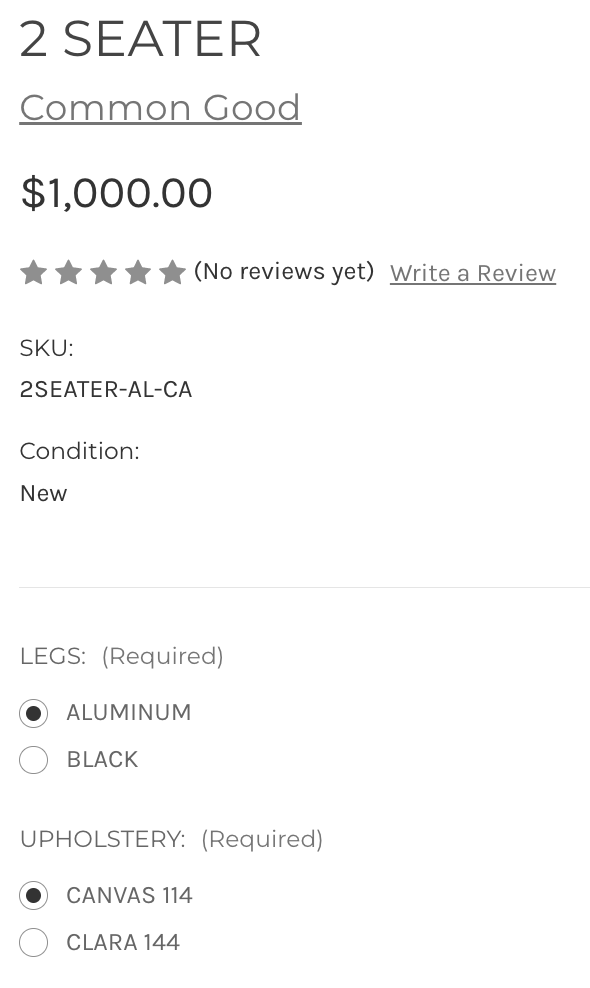
To achieve this, you first need to have a product with Variations in BigCommerce, so for this example we already have created the product 2 Seater in our BigCommerce account.
This product also has 2 options named LEGS and UPHOLSTERY respectively and each option has 2 possible values. Please notice they’ve been configured to be radio buttons. As a result we’ve 4 variations.
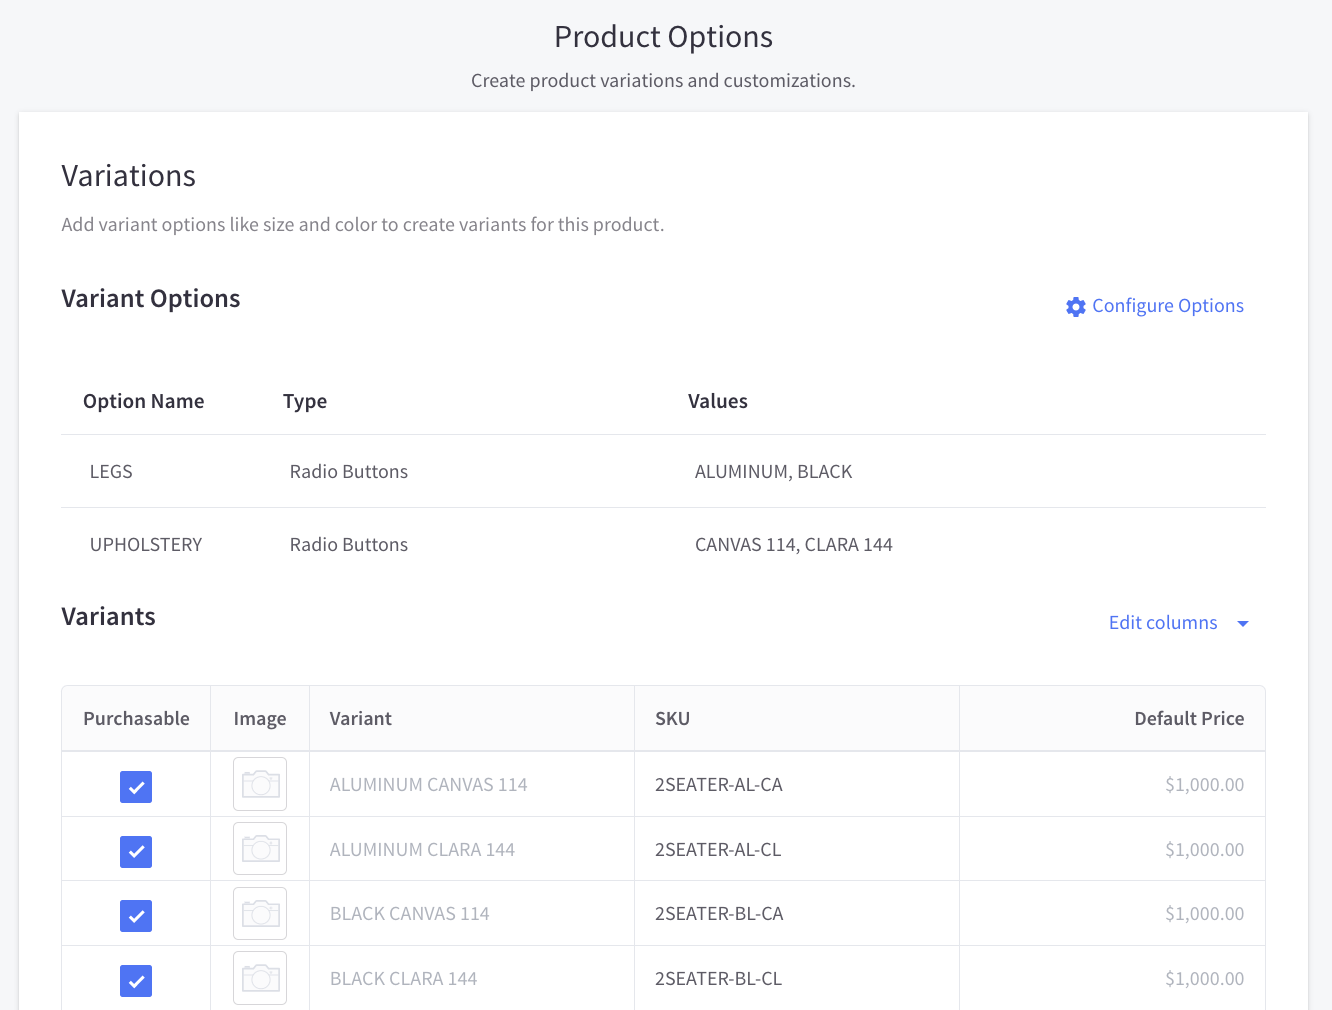
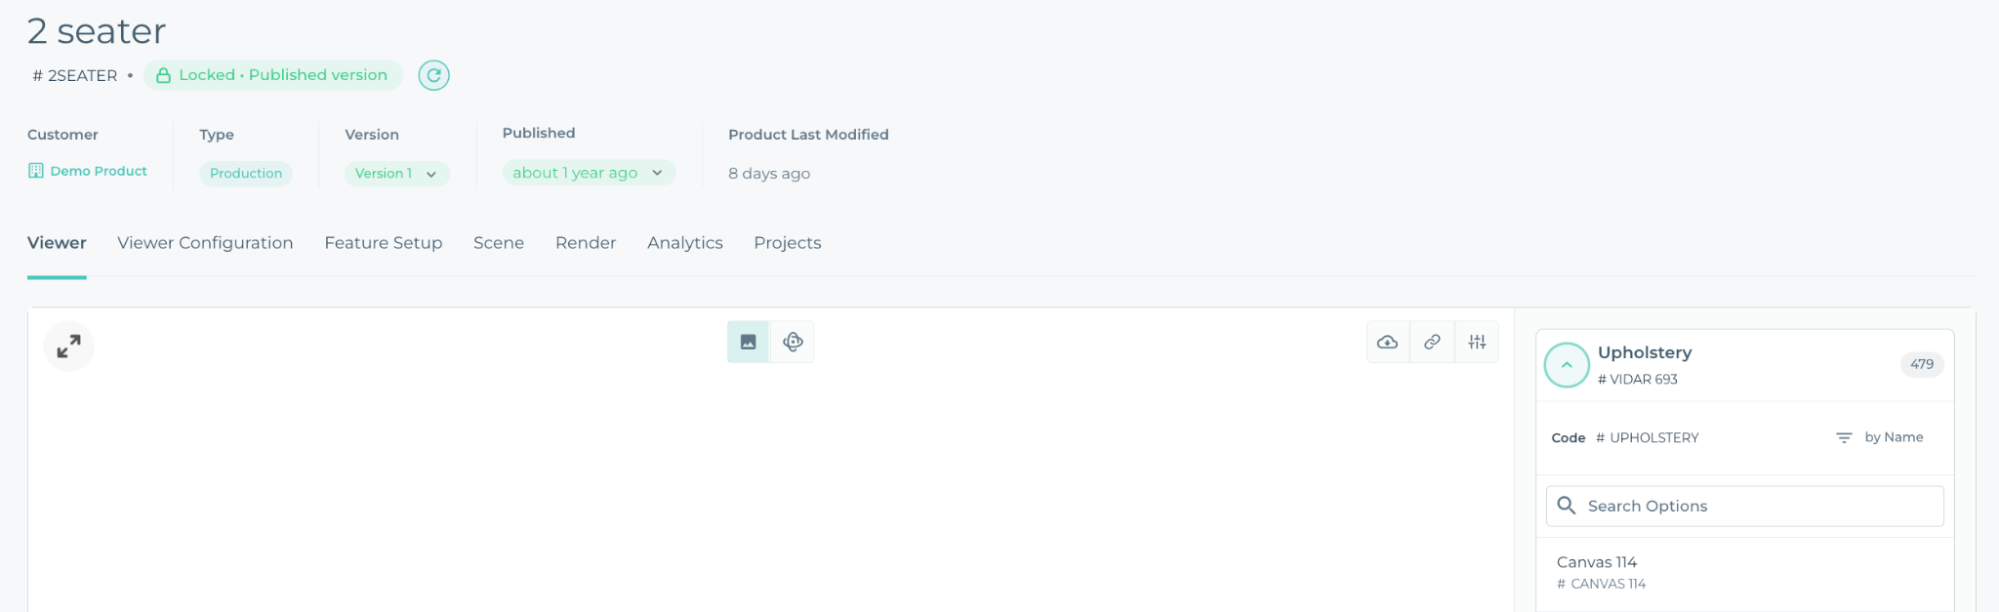
In Cylindo, the product needs to be configured using the same information stored in BigCommerce, if something doesn’t match, please reach out to our support team to get these codes aligned. The below image shows how codes are the same in both websites:
Please keep in mind that some special characters cannot be used for codes so our suggestion is to read this article to check if your codes contain any special characters. In case they’re not allowed, they will need to be replaced with something else. Don’t worry about the implementation, we’ll handle these special cases in the next section.
When data is aligned in both platforms we can proceed with the Viewer integration. So for this, we need to edit our Stencil theme. You can learn more about Stencil themes here.
In our Stencil theme we’re going to make the following changes:
- First of all we're going to add data attributes for the HTML elements of the Configuration Panel to store the information needed by Cylindo.
- With JavaScript we’re going to listen for the events of the Configuration Panel to detect when the variation is changed. When this happens we’re going to change the Features of the HD 360 Viewer.
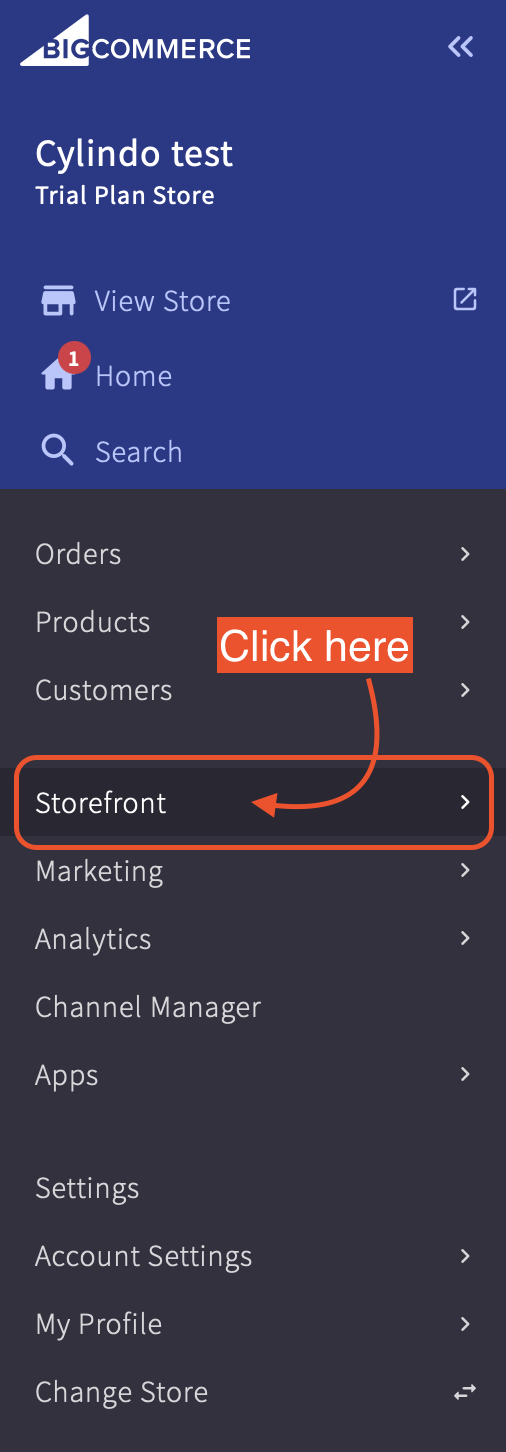
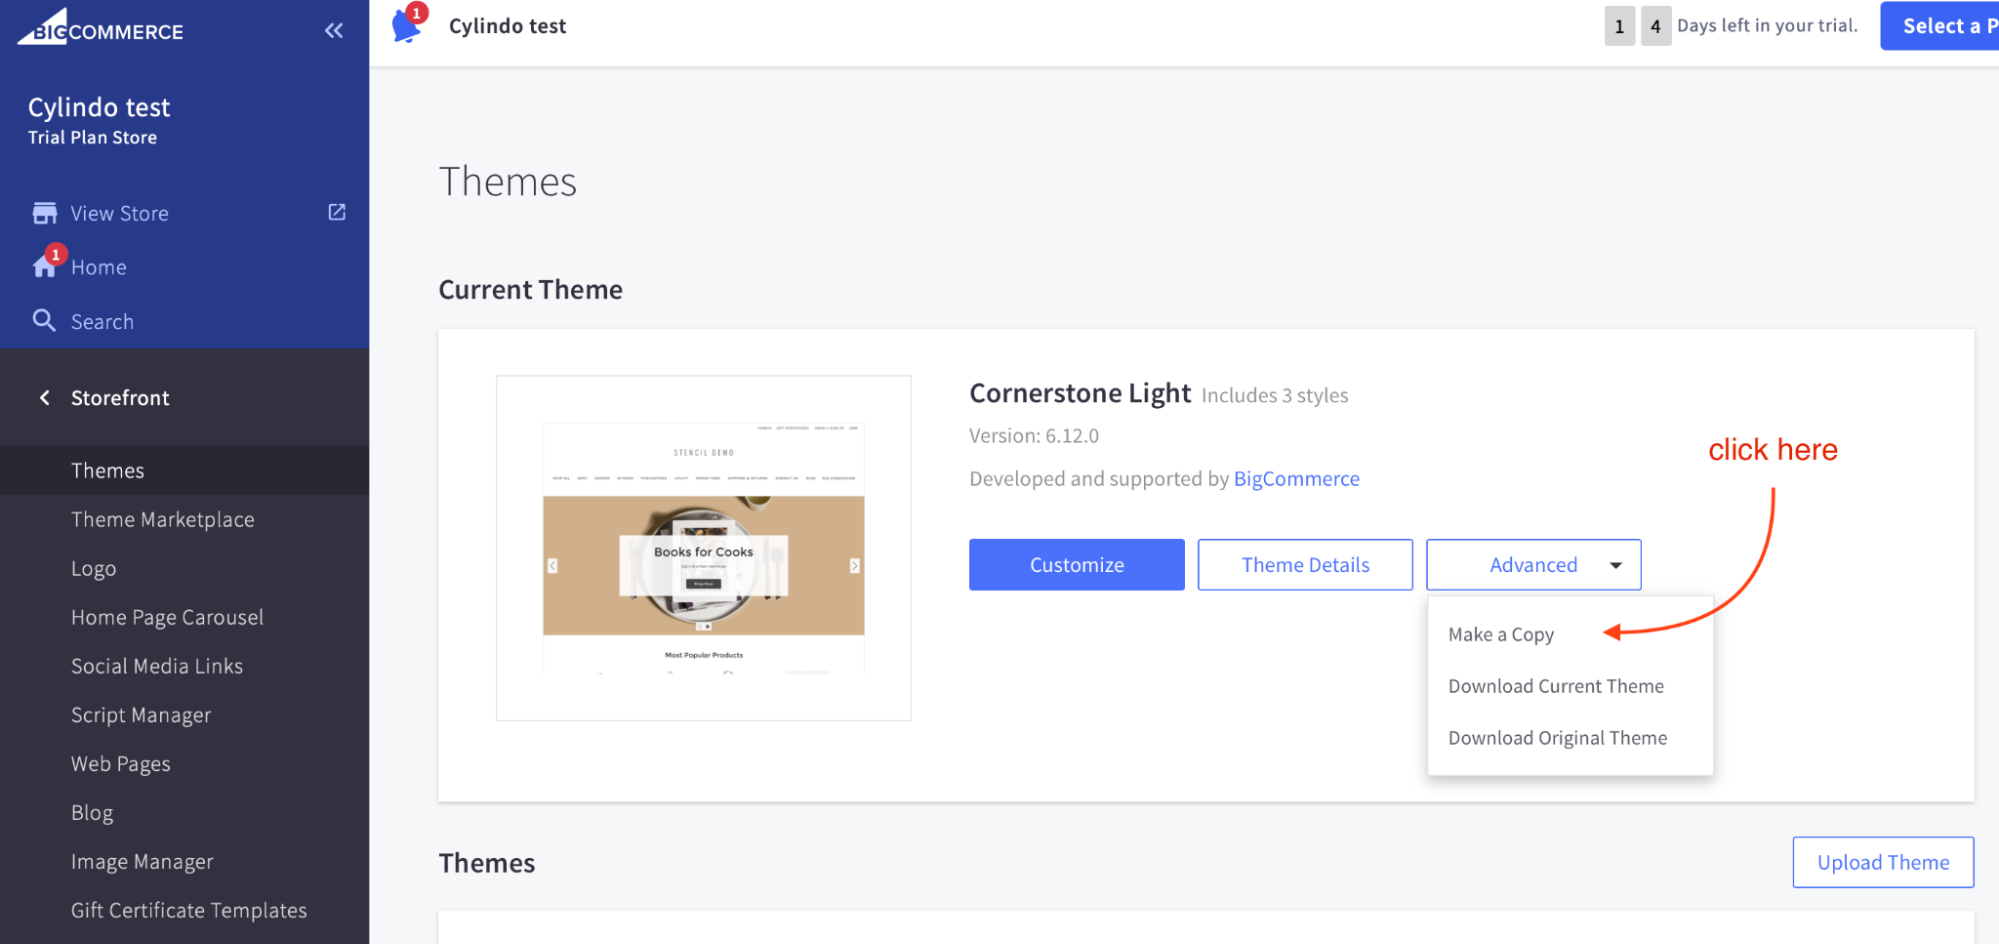
For our example, we’re using the Cornerstone theme, so to edit it, you need to go to the admin panel and select the option Storefront.
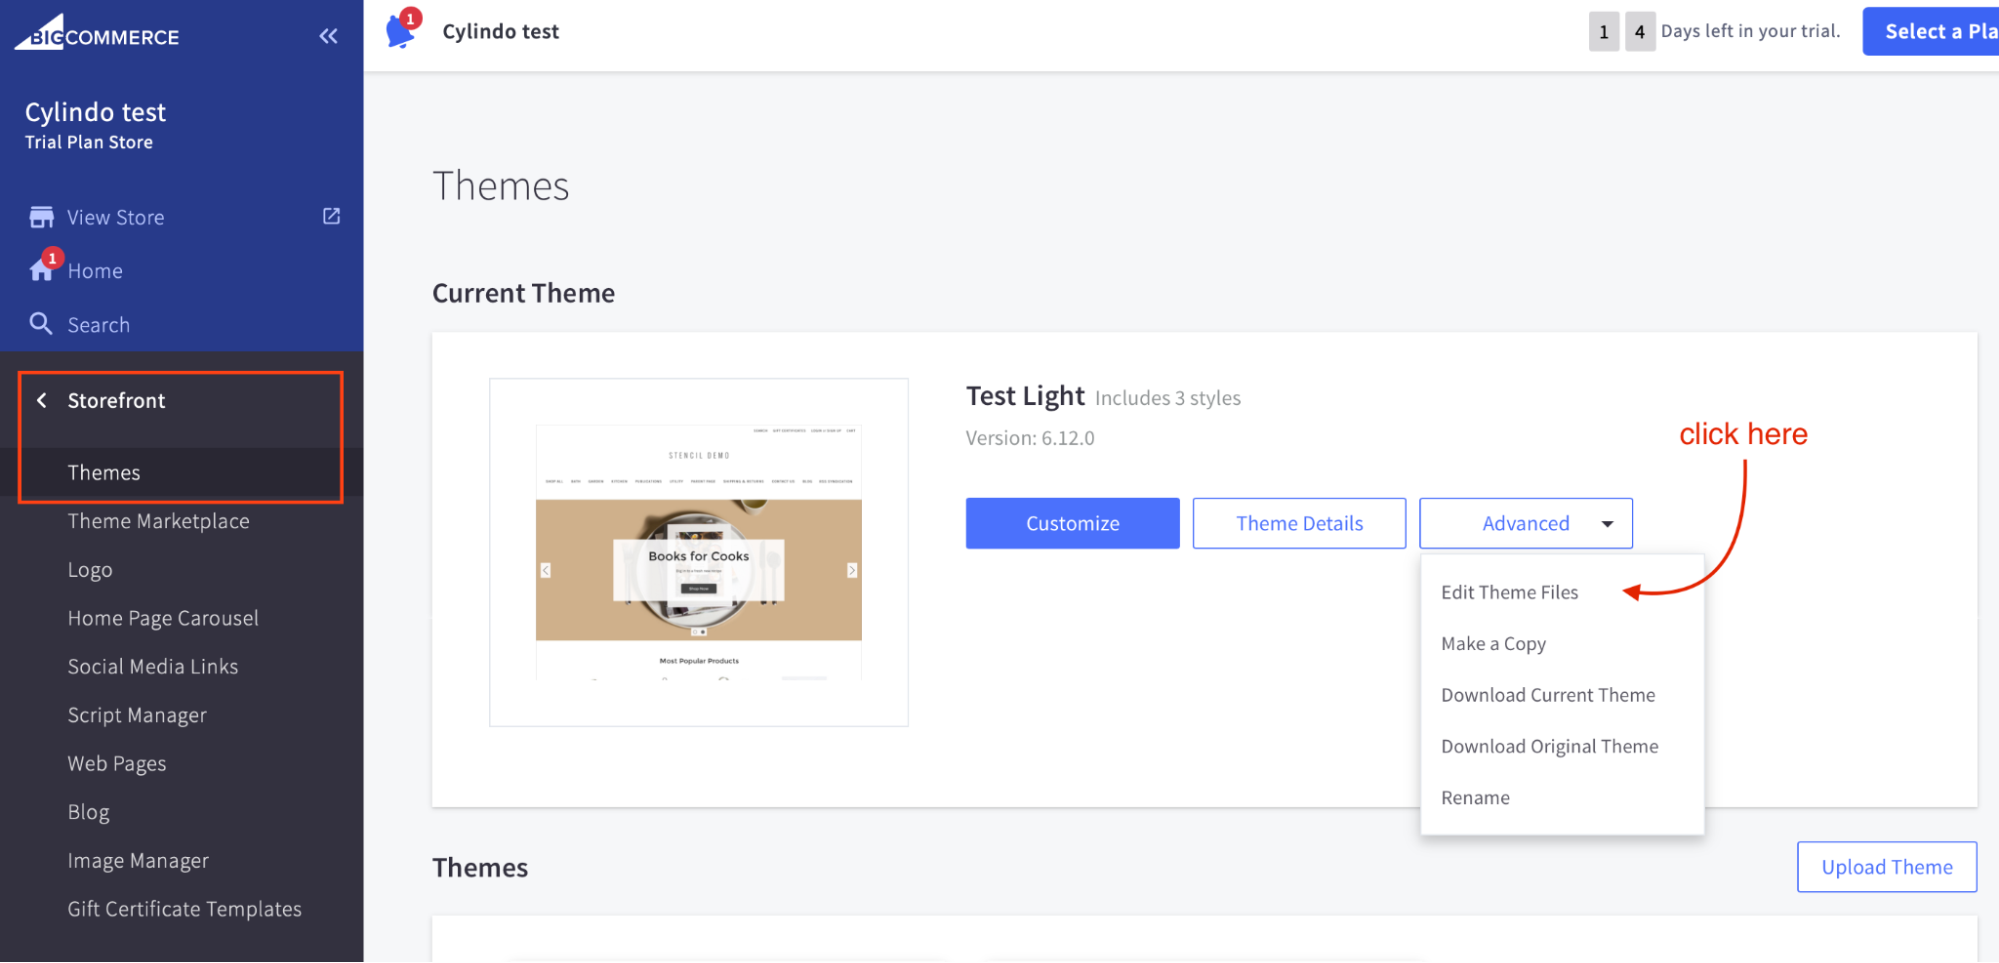
In this section you can modify the current theme or even modify the files of the current theme. This is what we’re going to do in the next section.
Please keep in mind that you need to create a copy of the current theme in case it has not been created yet, otherwise you won’t be able to edit the theme files
When you select Edit Theme Files the below window is displayed:
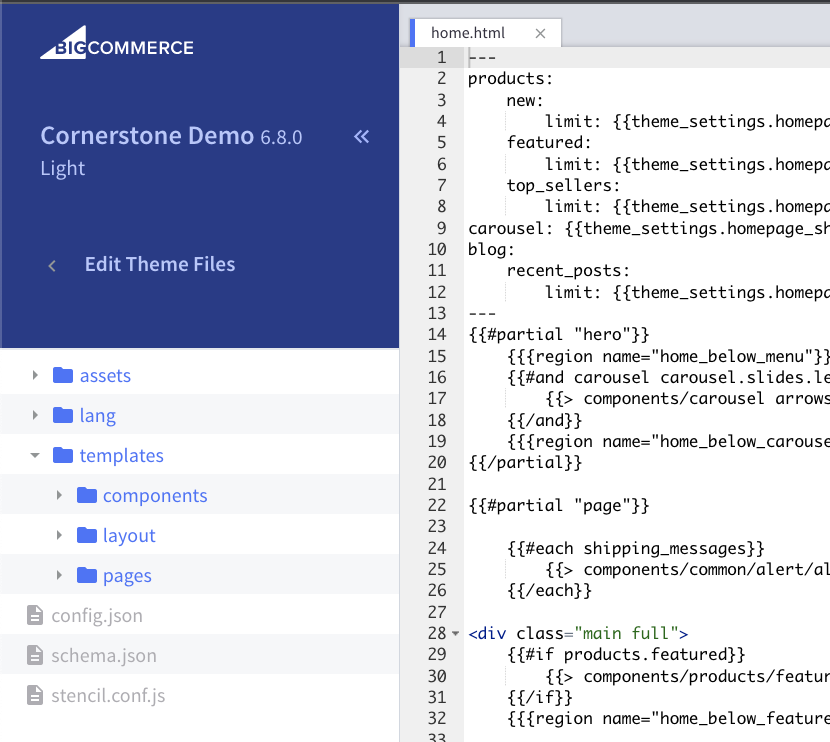
As we mentioned previously we’re working with the Cornerstone theme. So as you can see in the image above within this theme there are multiple folders, and one of them is a folder named templates.
Inside the templates folder there are 3 sub-folders named Components, Pages and Layout. These folders contain the source code of our online store.
Please note that Edit Theme Files allows you to modify these scripts mentioned above so you don’t need to download the theme to modify it in your local environment, however you can do it if you want.
Stencil themes are based-component oriented so if you already know a bit about this development methodology you already know that pages are created by bits of code named components.
So for this example, we’ll focus on modifying these components of our e-commerce platform to integrate the viewer. But before modifying them, it is worth mentioning that under the pages folder there is a page named product.html and this page calls the fist component we’ll modify. This component is named product-view and is located under the components/products/ folder.
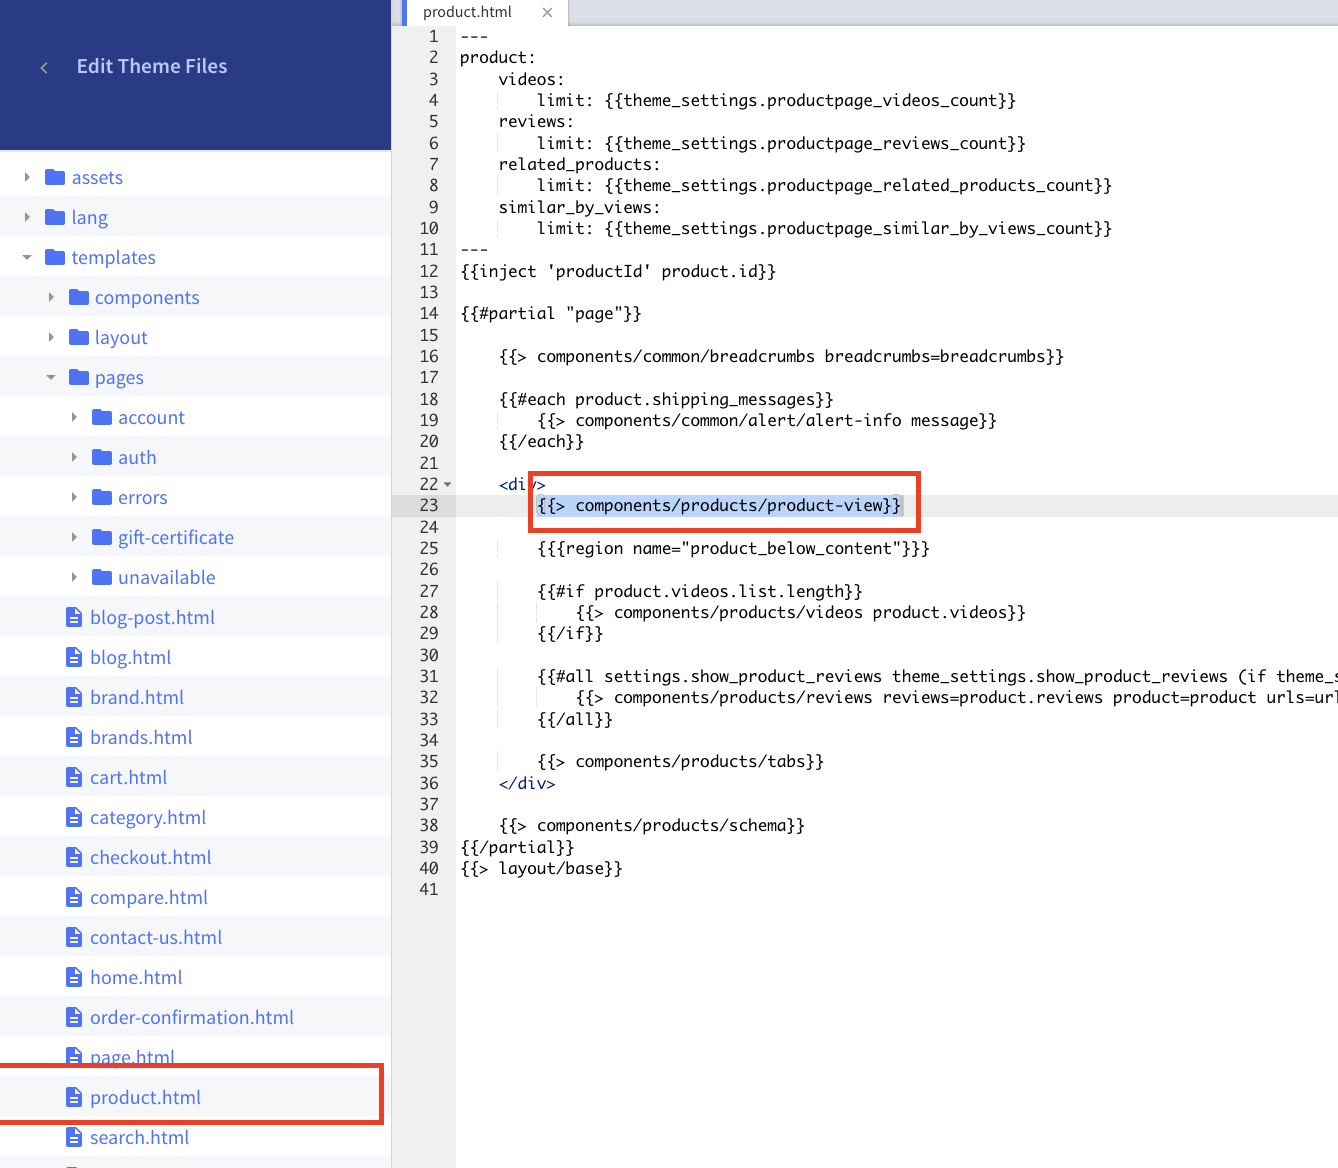
To start the viewer integration we need to update the product-view component in order to add the first data attribute that we need for the integration. Go to: Templates/products/product-view.html
In this component, you need to find the section where the product information is displayed, specifically the HTML element that displays the product SKU. We’ll use this HTML as reference and we’re going to add a data attribute to it with the same value it is displaying.
The screenshot below shows the data attribute that was added, we need to add a data attribute:
data-cylindo-product-code="{{product.sku}}"
Copy and paste the following code and replace the line 144 with it:
<dd
  class="productView-info-value"
  data-product-sku
  data-cylindo-product-code="{{product.sku}}"
>
  {{product.sku}}
</dd>

Now we need to do the same for the Features and Options (Variations).
Options are rendered using another component that is called within our product-view component. So now we need to find our product-options section. In this section options are rendered.

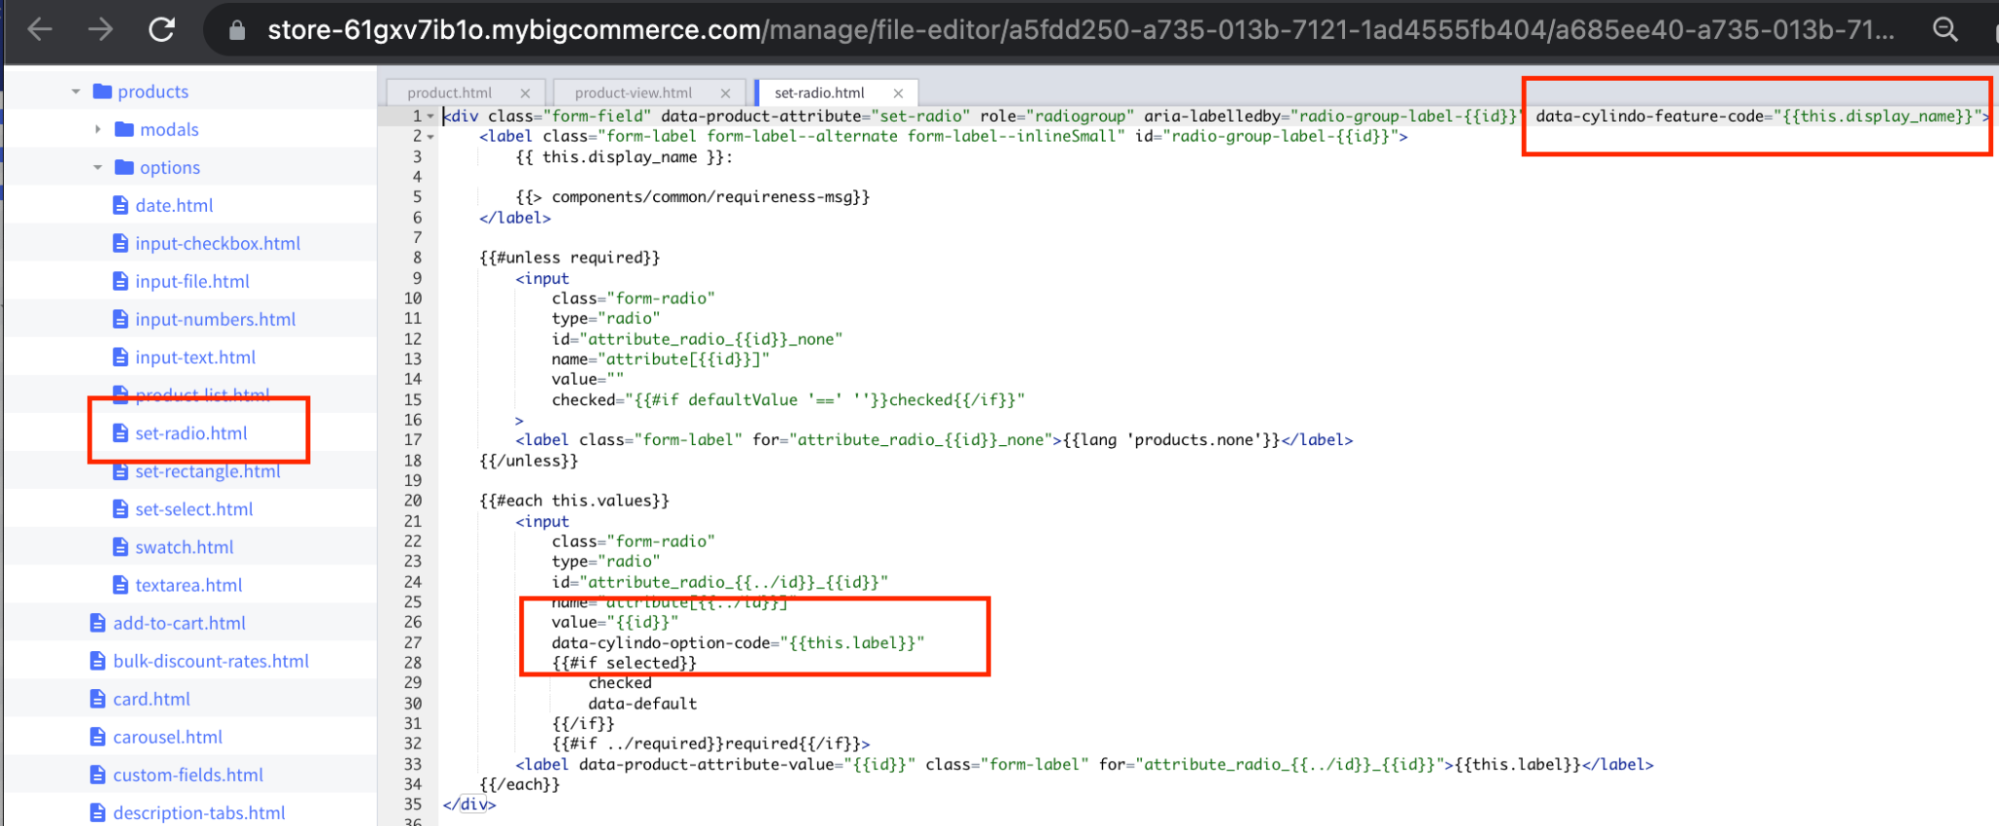
Please notice this section renders the option component dynamically according to the input type selected in the product configuration. In our case since we selected radio buttons for the options we will need to update the component set-radio that can be found under the folder components/products/options/
The screenshot below shows the file we are now modifying and also the changes we need to make into it.
Please notice that we’re adding 2 data attributes one for the Option name, i.e. Legs. And one for each Value of the feature, i.e. Black and Aluminum.
data-cylindo-feature-code="{{this.display_name}}"data-cylindo-option-code="{{this.label}}"
With these data attributes we’re sure that we’ve stored the information that we need to create the HD 360 viewer in the DOM and now we can consume it to create the viewer instance.
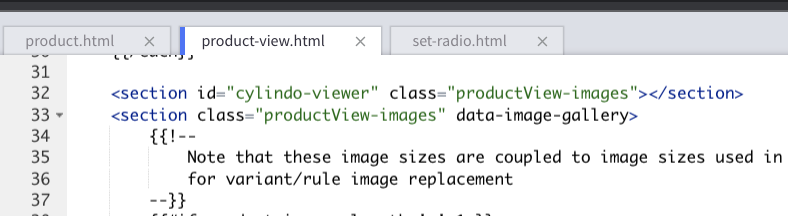
Now we need to prepare the HTML element where the viewer will be embedded so we need to go back to our product-view component to create the HTML element.
The correct place to add this new element is next to the element that holds the current gallery, the below image shows the viewer we’ve added on line 32 while line 33 shows the HTML element of the default gallery.
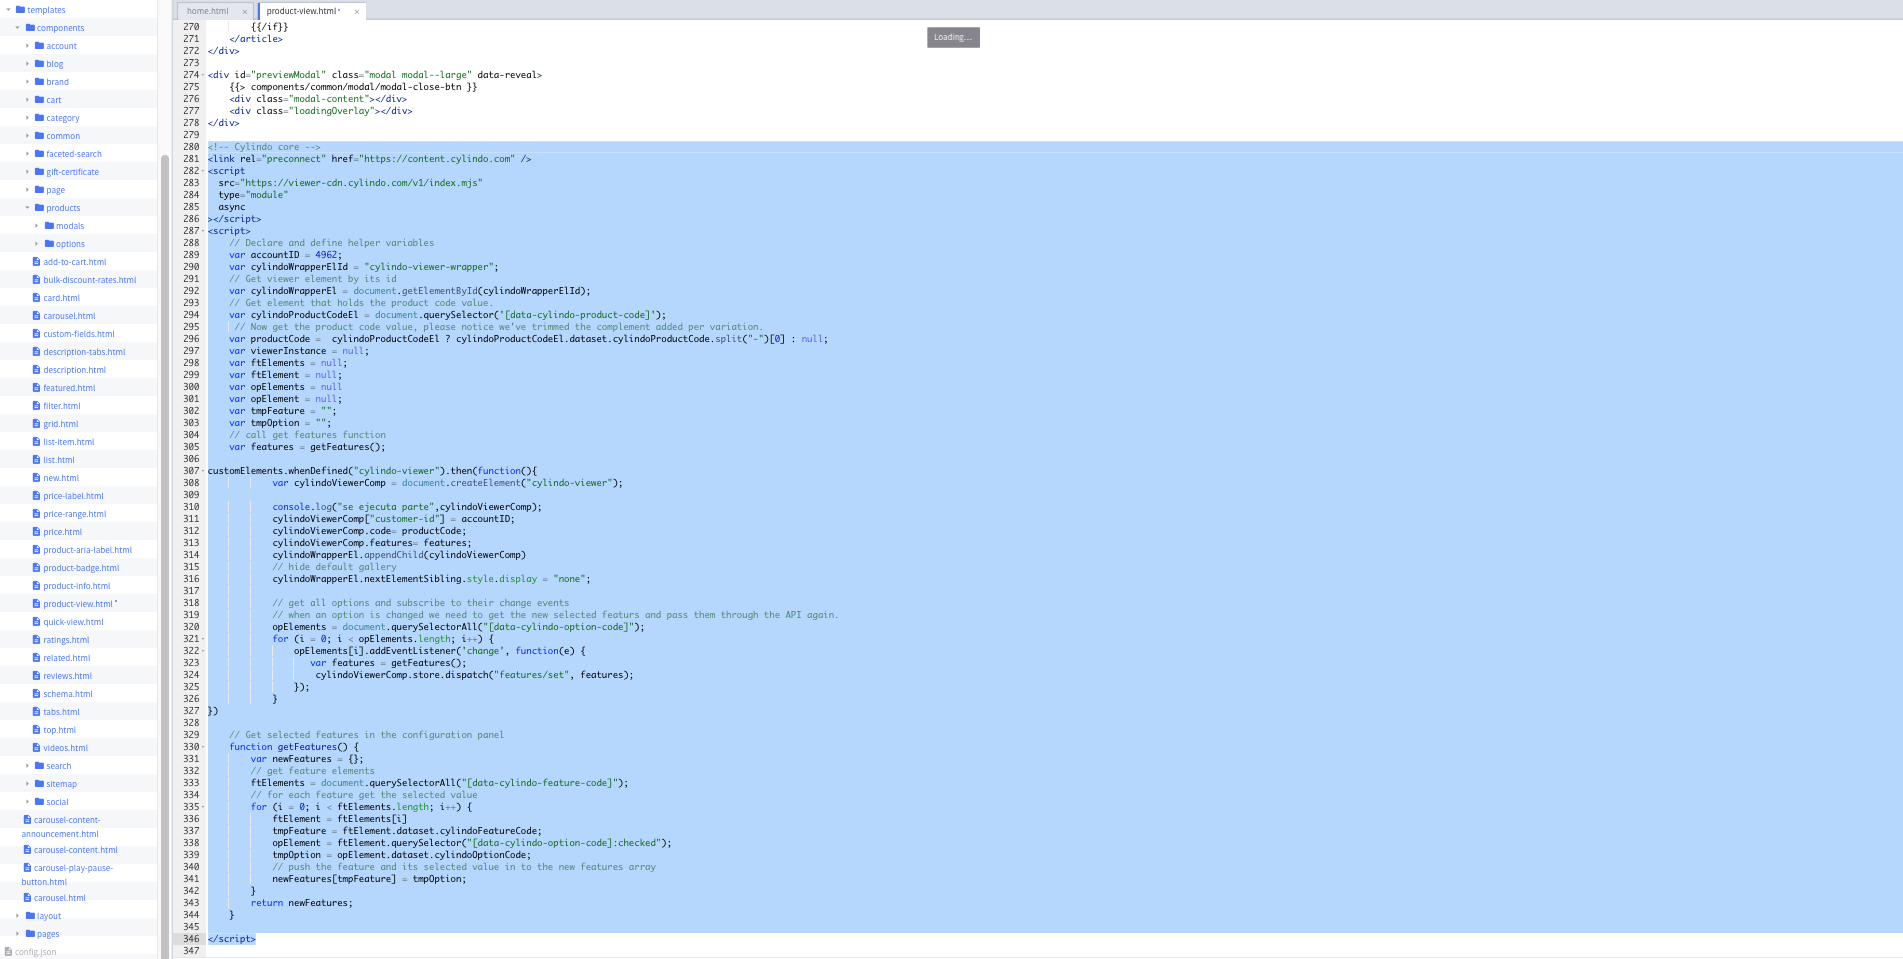
Now we just need to create the viewer instance, for it we are going to copy and paste the following script:
<!-- Cylindo core -->
<link rel="preconnect" href="https://content.cylindo.com" />
<script
  src="https://viewer-cdn.cylindo.com/v1/index.mjs"
  type="module"
  async
></script>
<script>
  // Declare and define helper variables
  const accountID = 4962;
  const cylindoWrapperElId = "cylindo-viewer-wrapper";
  // Get viewer element by its id
  const cylindoWrapperEl = document.getElementById(cylindoWrapperElId);
  // Get element that holds the product code value.
  const cylindoProductCodeEl = document.querySelector(
    "[data-cylindo-product-code]"
  );
  // Now get the product code value, please notice we've trimmed the complement added per variation.
  const productCode = cylindoProductCodeEl
    ? cylindoProductCodeEl.dataset.cylindoProductCode.split("-")[0]
    : null;
  let ftElements = null;
  let ftElement = null;
  let opElements = null;
  let opElement = null;
  let tmpFeature = "";
  let tmpOption = "";
  // call get features function
  const features = getFeatures();

  customElements.whenDefined("cylindo-viewer").then(function () {
    const cylindoViewerComp = document.createElement("cylindo-viewer");

    cylindoViewerComp["customer-id"] = accountID;
    cylindoViewerComp.code = productCode;
    cylindoViewerComp.features = features;
    cylindoWrapperEl.appendChild(cylindoViewerComp);
    // hide default gallery
    cylindoWrapperEl.nextElementSibling.style.display = "none";

    // get all options and subscribe to their change events
    // when an option is changed we need to get the new selected features and pass them through the API again.
    opElements = document.querySelectorAll("[data-cylindo-option-code]");
    for (let i = 0; i < opElements.length; i++) {
      opElements[i].addEventListener("change", function () {
        const features = getFeatures();
        cylindoViewerComp.store.dispatch("features/set", features);
      });
    }
  });

  // Get selected features in the configuration panel
  function getFeatures() {
    const newFeatures = {};
    // get feature elements
    ftElements = document.querySelectorAll("[data-cylindo-feature-code]");
    // for each feature get the selected value
    for (let i = 0; i < ftElements.length; i++) {
      ftElement = ftElements[i];
      tmpFeature = ftElement.dataset.cylindoFeatureCode;
      opElement = ftElement.querySelector("[data-cylindo-option-code]:checked");
      tmpOption = opElement.dataset.cylindoOptionCode;
      // push the feature and its selected value in to the new features array
      newFeatures[tmpFeature] = tmpOption;
    }
    return newFeatures;
  }
</script>
You will need to paste that in the last line of the code of product-view.html, like this:
In case you’re using a different template, you may need to adjust the script provided or also you may need to place the data attributes in different elements. The important thing is that it follows the same approach and stores the information that Cylindo needs in this kind of attributes to use them through the provided script.
In case you’ve special characters stored in BigCommerce, you would need to modify the getFeatures method from the documentation to replace the special characters before they’re pushed into the array.
tmpFeature = tmpFeature.replace(/special-character/g, “fallback-character-to-be-used”)
newFeatures.push(tmpFeature, tmpOption);
As a result you will have the HD 360 Viewer in your PDP pages. Features should change when the configuration panel is used.