Klaviyo Implementation via Shopify
Klaviyo is a web-based platform designed to empower businesses with insights into customer interactions. Once integrated, users can harness a wealth of data on their customers, enabling them to refine their marketing approaches and foster long-term relationships.
Upon your first login to Klaviyo, the platform offers a Setup Wizard to help you establish your ecommerce store. Presently, Klaviyo extends its support to numerous platforms, including Shopify, Magento (versions 1 and 2), WooCommerce, BigCommerce, and more.
For platforms not directly supported via Klaviyo's wizards, there are APIs available for custom integrations.
This tutorial delves into Klaviyo's tools and demonstrates the integration of the Cylindo Content API with Klaviyo. We will use Shopify as our example platform. As a result of this integration, Cylindo images will be showcased in Abandoned Cart emails generated by Klaviyo flows.
It's important to note that even if a user isn't on Shopify, this guide remains useful. While we focus on Shopify, our use of Klaviyo's JavaScript API also serves as a foundation for custom integrations, helping businesses to craft their unique events and flows.
For Shopify users specifically, please consult the Documentation of the Curator with Shopify’s integration before proceeding. This guide builds upon that foundation, and some code snippets from the integration tutorial will be referenced here.
Ecommerce Configuration
As previously noted, this tutorial will guide you through implementing Klaviyo within our Shopify online store.
However, before diving into Klaviyo's installation and configuration on our ecommerce platform, it's worth mentioning that this guide is rooted in the official documentation provided by Klaviyo.
For further details on Klaviyo configurations or tools, we recommend referring to Klaviyo's comprehensive documentation or consulting their forums.
For inquiries related to the Cylindo Content or APIs, reach out to the support team at support@cylindo.com.
1. Klaviyo App Installation in Shopify
According to Klaviyo's official documentation, there are two primary types of onsite tracking:
-
Active on Site: Tracks when an identifiable browser visits your website.
-
Viewed Product: Tracks when an identifiable browser views a product page (ideal for ecommerce stores).
These 2 key types can be enabled automatically through the ecommerce integrations that Klaviyo offers, this is the case of Shopify, some other tools require that you copy short snippets of code to your website.
To enable the Active on Site functionality for Shopify, you need to follow the below steps.
-
Login in your Klaviyo account.If you do not have a Klaviyo account yet, you will need to create one.
-
In your Klaviyo account, you should navigate to the Integrations tab and search for Shopify.
-
Once the result is displayed, click Add Integration to add the integration to your Klaviyo account.

-
When this integration is added, you’ll be redirected to the Shopify Settings page.
-
In this page, Klaviyo platform details how to configure your Shopify settings in Klaviyo before connecting your Shopify account.
-
Please notice that in case you need to modify these settings in the future, you can always return to this page, to make the required changes, and then click Update Settings to update the Shopify configuration.
-
In the Shopify settings form, paste the URL of your online store in the Store URL input in the format my.shopify.com.
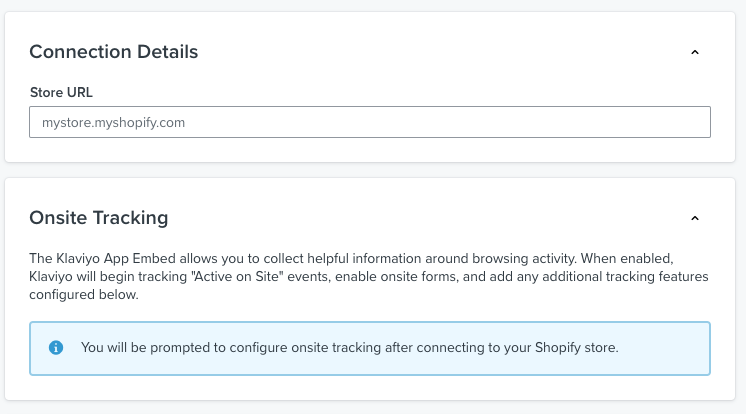
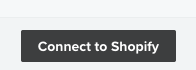
- Click the right bottom button named Connect to Shopify and confirm the integration.
-
This is the Confirmation modal that we should also agree to complete the integration.
-
When the integration is complete all the settings of the page are enabled, so the next step to continue with the integration is to enable the Onsite Tracking of the Shopify website.
-
To enable the Onsite Tracking go to the section below the Stored URL, on this section click the link view your Shopify App Embed Settings from the first paragraph.
-
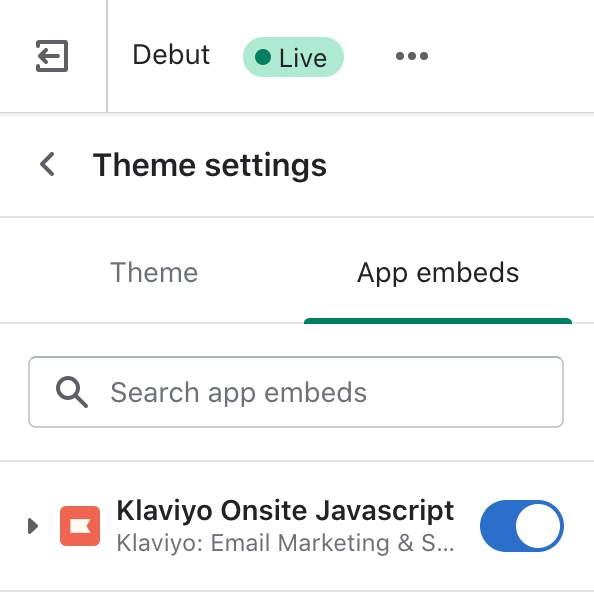
After clicking the link, you’ll be redirected to Shopify, and you’ll see the tab of the App embedded. On this tab make sure the Klaviyo app embed is toggled on.
-
Click save and go back to the Shopify Integration settings in Klaviyo and refresh the page.
-
When the page loads again the Klaviyo App Embed is enabled on your Shopify store. Text is highlighted with green and the Panel is enabled.
Enable the Add Viewed Product tracking to my site checkbox and click the Update Settings button located in the bottom right corner.
At this moment, it is worth mentioning that once the Onsite tracking has been added to your website, the Klaviyo core will start tracking the events. Klaviyo users need to keep in mind that it only happens for the browsing activity of "known browsers"
There are 3 ways that Klaviyo recognizes a browser:
- If someone has, at some point, clicked through a Klaviyo email to your website
- If someone has, at some point, subscribed/opted-in through a Klaviyo form
- If someone has, at some point, logged into your site and you have identify tracking installed
By default, Klaviyo triggers the event Checkout Started Process once a customer and browser have been recognized by Klaviyo, and the purchase has not been executed.
-
To confirm the configuration we’ve performed is working properly, open a browser instance in incognito mode and open your Shopify there by adding the below query string. The purpose of the query string in your url is to force Klaviyo to add the cookie in your browser instance to recognize the user and browser in the Klaviyo side and initialize a profile and session.
-
This is the query string needed to be added in URL:
?utm_email=product@cylindo.com -
This is how your url should look like: https://mystore.myshopify.com/?utm_email=product@cylindo.com
-
Once the website is open go back to the Klaviyo platform and open the option Profiles from the main menu displayed on the left panel.
-
In the list displayed a new profile should be created and when this user is open the event Active on Site should be displayed in the list of events added.
For any further configurations needed in Shopify integration or troubleshoot any issue related with the Viewed products events, read these articles:
https://help.klaviyo.com/hc/en-us/articles/115005080407
https://help.klaviyo.com/hc/en-us/articles/4416172774939
For companies that are not using Shopify, but they are using an ecommerce platform supported by Klaviyo, such as Magento, BigCommerce or WooCommerce. They need to install and configure the Klaviyo platform following the steps from the “How to integrate” section from the below documentation:
Klaviyo ecommerce integrations.
https://help.klaviyo.com/hc/en-us/categories/115000032731
For companies that are not using an ecommerce platform supported by Klaviyo, customers need to install the Klaviyo JavaScript API, Identify their customers and track the Viewed product events manually.
To learn more about it ready this article:
https://developers.klaviyo.com/en/docs/javascript-api
2. Added to Cart event
For our flow, we’ll follow up the Abandoned Carts through the Added to Cart and the Checkout events from our website.
To achieve this, we need to validate if the purchase is not completed after a period of time after the user started the process of filling the shopping cart.
So for example, if the customer added a product to the cart and after 4 hours the purchase is not completed, we can send an email as a reminder of the abandoned cart to invite the customer to complete the purchase.
The way we inform Klaviyo about the interaction of the user in the webpage is the same for all the cases. We need to track events within the ecommerce platform.
So, for this specific case we need to track an event named Added to Cart, when the cart is updated.
To create the Added to Cart event, Klaviyo team provides snippets in their website that can be used as an example. These snippets are not available for all the ecommerce platforms and differ from each other, depending on the platform and the way the platform works.
For example, Shopify’s integrations should use 1 of the 3 snippets shown in this page:
The way a customer identifies which snippet should be used is explained in the documentation. For some other cases such as Magento or platforms that are not supported by Klaviyo. The Klaviyo team doesn’t offer a specific snippet to be implemented in these websites.
But as they mention in their documentation and forums, customers can still get this set up by using the same JavaScript API we mentioned in the previous section to identify the users and track the Viewed Product event.
You can learn more about the JavaScript API here:
The difference between the snippets and the custom implementations, is that custom implementations need to find the best place to track the event and also, These customers need to fill event values with the information from the online store manually, while the snippets have instructions about where they need to be copied and pasted and also they also include the values of the event filled.
So, in order to configure our Added to Cart event in shopify we need to follow up the below steps:
-
To send an Added to Cart event to Klaviyo, go back to the Shopify integration panel in Klaviyo and scroll down to the Onsite Tracking section.
-
Click the link how to set up Added to Cart tracking in our help article. From the text located at the bottom of this section. The link redirects to the below link:
-
Copy and paste in the Shopify store the script (snippet) mentioned in this article.
The script has 3 variations depending on the workflow of each online store.
-
If your website doesn’t redirect to the cart once the Add to Cart button is clicked use the first snippet.
-
If your website executes a redirection when the button is clicked then you’ll have 2 variations.
- The first variation is for cases where the Add to Cart button has an ID to identify the element.
- The second variation is when multiple Add to Cart buttons exist in the online store and they use class notation to identify them.
-
For the use case of this tutorial the Add to cart button doesn’t execute a redirection when it is clicked, so the snippet used was the first one from the provided list.
-
The below snippet was added to the theme.liquid file as they suggest in their documentation.
-
The Klaviyo snippet has the following purpose
- Since the page doesn’t execute a redirect, for this type of online stores, Shopify executes 2 Ajax calls for the Add to Cart process.
- The first Ajax call is to add the item to the cart, while the second Ajax call is to get the items of the cart.
- For the second ajax call, Shopify uses the file cart.js, so Klaviyo is reusing this file/endpoint, because it is in charge of retrieving the items added to the cart and we need them to forward them to the.
- When a product is added to the cart, what the Klaviyo snippet does is to call the cart.js file to get the items added to the cart and uses the window object named _learnq to push them to track the Added to Cart event.
- When this event is triggered, they create a new object that will be received by Klaviyo. Please notice that they push the items and some other values such as the total price in the object.
- Another important note here is that they override the fetch behavior so when the cart.js endpoint is called through ajax Klaviyo sends again the event so there is no need to execute this functionality in another page because it should keep sending the information updated each time an element is added to the cart.
Klaviyo Snippet:
var _learnq = _learnq || [];
function addedToCart() {
  fetch(`${window.location.origin}/cart.js`).then(res =>
    res
      .clone()
      .json()
      .then(data => {
        var cart = {
          total_price: data.total_price / 100,
          $value: data.total_price / 100,
          total_discount: data.total_discount,
          original_total_price: data.original_total_price / 100,
          items: data.items,
        };
        if (item !== "undefined") {
          cart = Object.assign(cart, item);
        }
        _learnq.push(["track", "Added to Cart", cart]);
      })
  );
}
(function (ns, fetch) {
  ns.fetch = function () {
    const response = fetch.apply(this, arguments);
    response.then(res => {
      if (`${window.location.origin}/cart/add.js`.includes(res.url)) {
        addedToCart();
      }
    });
    return response;
  };
})(window, window.fetch);
$(document).ajaxComplete(function (event, request, settings) {
  if (settings.url == "/cart/add.js") {
    addedToCart();
  }
});
-
When the Klaviyo snippet is added and the website is refreshed, the event we’ve added must be displayed each time a new product is added to the Cart.
-
It can be confirmed by opening the profile of the customer used for testing purposes and above the first Active on Site event, the new Added to Cart event must be displayed.

- At this point we could start working on the Flows, but first we need to update the snippet added in Shopify to make sure that the Cylindo Image is sent to Klaviyo.
3. Modify Added to Cart event to add Cylindo Content URLs
-
To continue with our example, we need to modify our Shopify’s Product Detail Page to achieve the following behavior.
-
From now, each time a product is added to the cart in the PDP, we’re going to generate the path of the Cylindo images that we’re going to use in Klaviyo using the Cylindo’s Content API.
-
To create the images we’re going to use Line item properties from Shopify, as they explain in their documentation these properties are used to collect customized information for an item added to the cart. This information can be collected from the buyer on the product page.
-
To learn more about line item properties, please read the below links
-
-
The line item properties should be added in the file main-product.liquid file from the Sections folder that we’ve modified in our Integration tutorial.
-
On this file we need to add the below snippets to add the cylindo urls to the cart items
-
The below HTML elements need to be added within the cart form.
<input
  id="cylindo-360-image"
  type="hidden"
  name="properties[cylindo_360_image]"
  value=""
/>
<input
  id="cylindo-qr-image"
  type="hidden"
  name="properties[cylindo_qr_image]"
  value=""
/>
The resultant html should look like this:

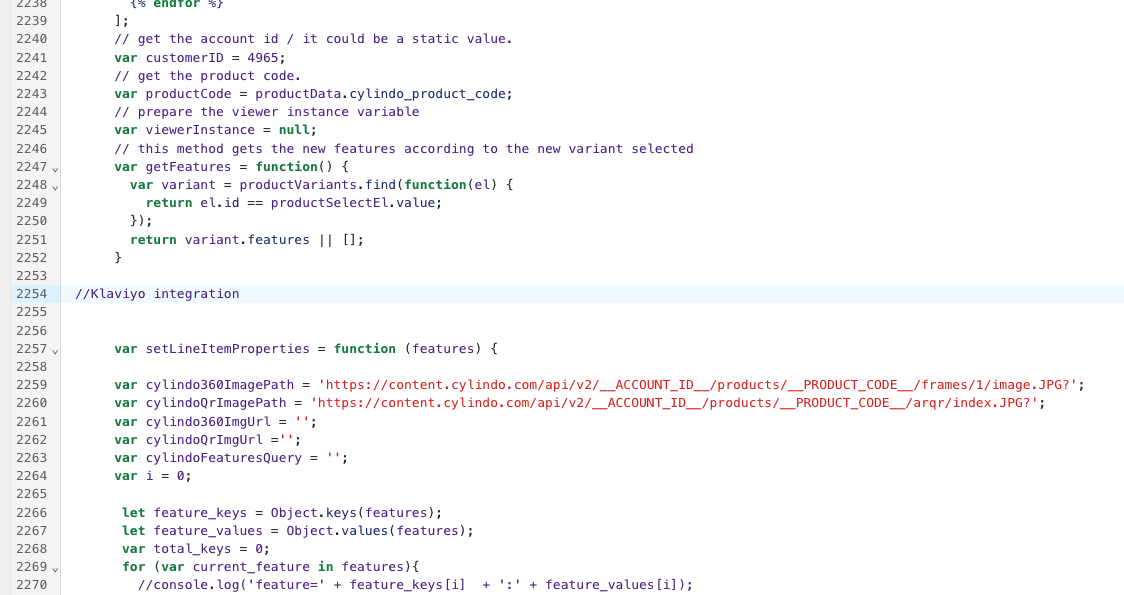
The below JS function named setLineItemProperties should be pasted right after the declaration of the getFeatures function.
//Klaviyo integration
var setLineItemProperties = function (features) {
  var cylindo360ImagePath =
    "https://content.cylindo.com/api/v2/__ACCOUNT_ID__/products/__PRODUCT_CODE__/frames/1/image.JPG?";
  var cylindoQrImagePath =
    "https://content.cylindo.com/api/v2/__ACCOUNT_ID__/products/__PRODUCT_CODE__/arqr/index.JPG?";
  var cylindo360ImgUrl = "";
  var cylindoQrImgUrl = "";
  var cylindoFeaturesQuery = "";
  var i = 0;

  let feature_keys = Object.keys(features);
  let feature_values = Object.values(features);
  var total_keys = 0;
  for (var current_feature in features) {
    cylindoFeaturesQuery =
      cylindoFeaturesQuery +
      "feature=" +
      feature_keys[i] +
      ":" +
      feature_values[i] +
      "&";
    i++;
  }

  // create 360 image path
  cylindo360ImgUrl = cylindo360ImagePath.replace(/__ACCOUNT_ID__/g, customerID);
  cylindo360ImgUrl = cylindo360ImgUrl.replace(/__PRODUCT_CODE__/g, productCode);
  cylindo360ImgUrl = cylindo360ImgUrl + cylindoFeaturesQuery;

  //create qr code image path

  cylindoQrImgUrl = cylindoQrImagePath.replace(/__ACCOUNT_ID__/g, customerID);
  cylindoQrImgUrl = cylindoQrImgUrl.replace(/__PRODUCT_CODE__/g, productCode);
  cylindoQrImgUrl = cylindoQrImgUrl + cylindoFeaturesQuery;

  //update properties

  $("#cylindo-360-image").val(cylindo360ImgUrl);
  $("#cylindo-qr-image").val(cylindoQrImgUrl);
};

//end of klaviyo integration
The resultant JS should look like this:
Now we need to execute our setLineItemProperties right after the viewer creation and also right after the features are changed. Please notice that we’re passing the array of features that we calculate each time the features are changed through the function.

-
To confirm everything works properly we should save our PDP template, refresh the page and start adding products to the cart with the Browser console open.
-
In the network tab when you search for cart, 2 ajax calls are shown and for each of them each time product is added to the cart the items should contain the properties filled with our Cylindo images:
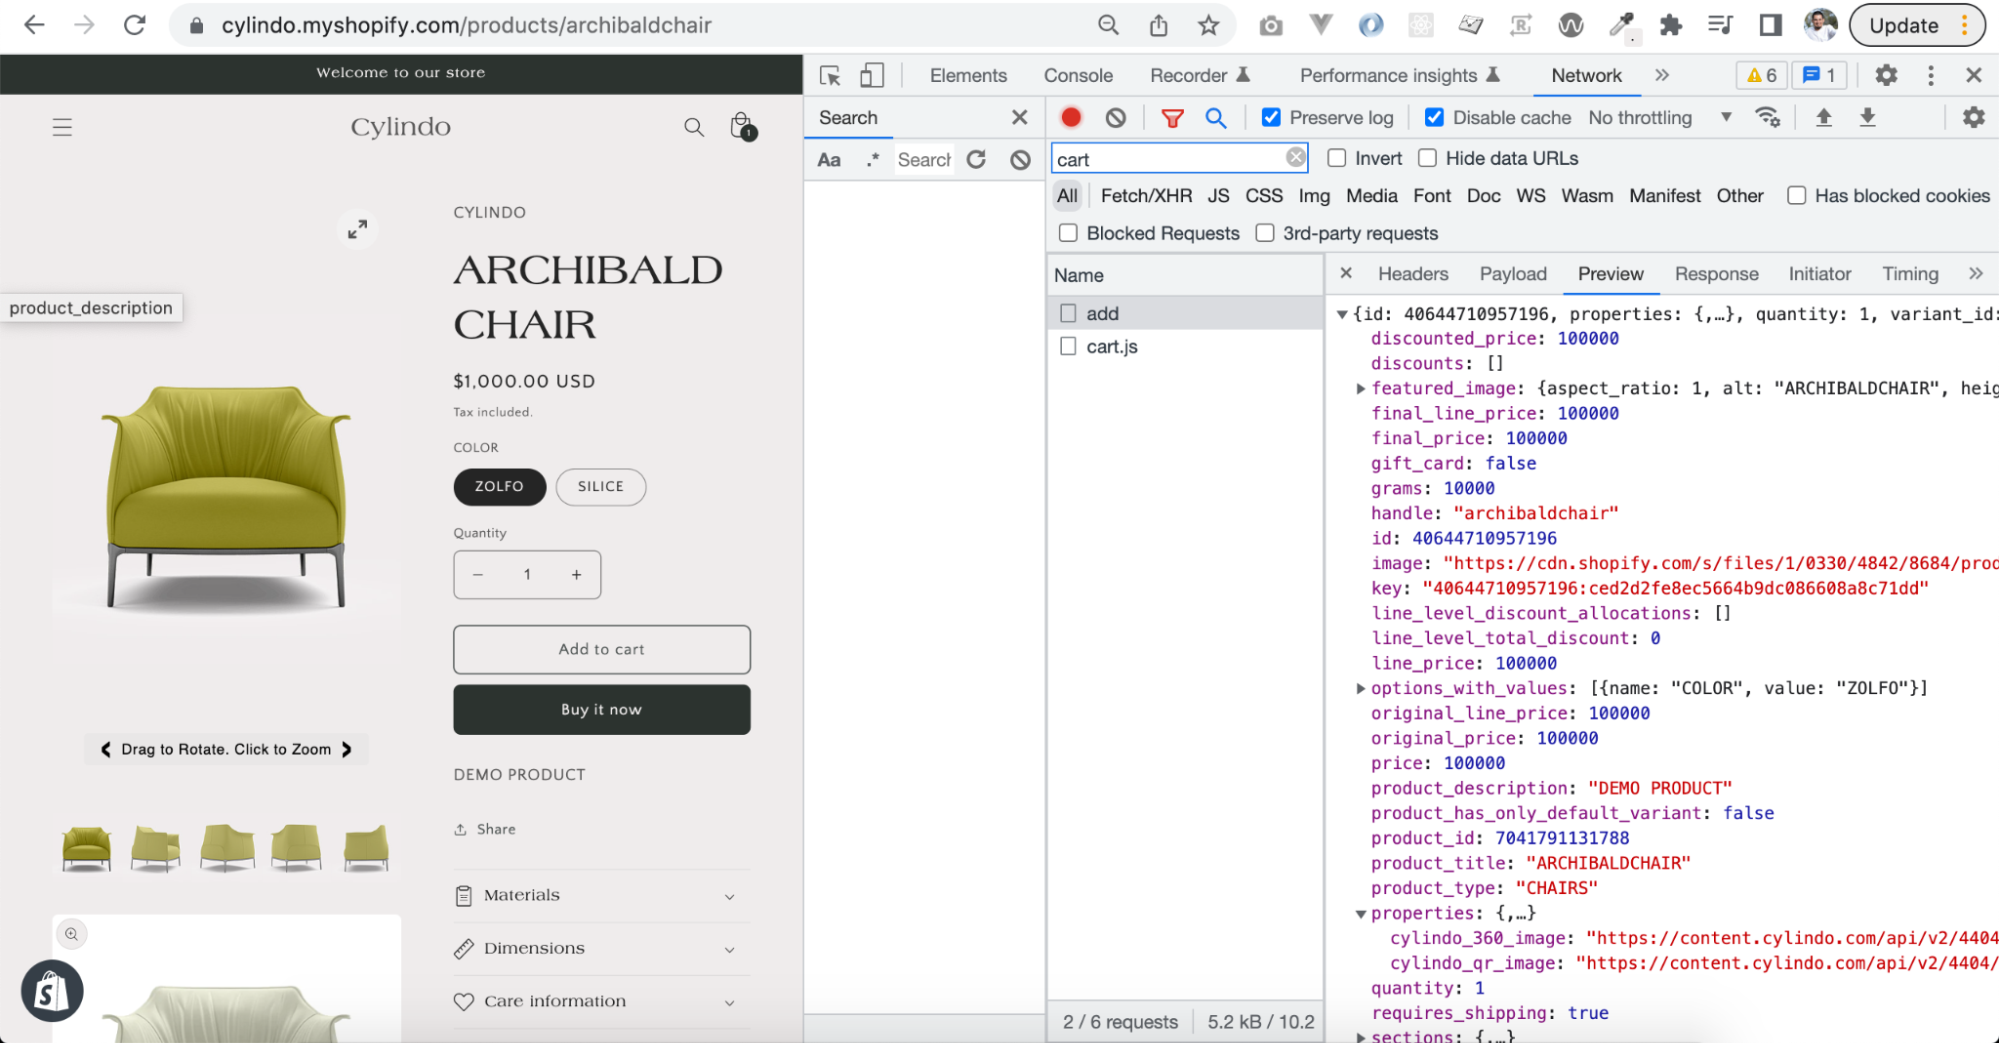
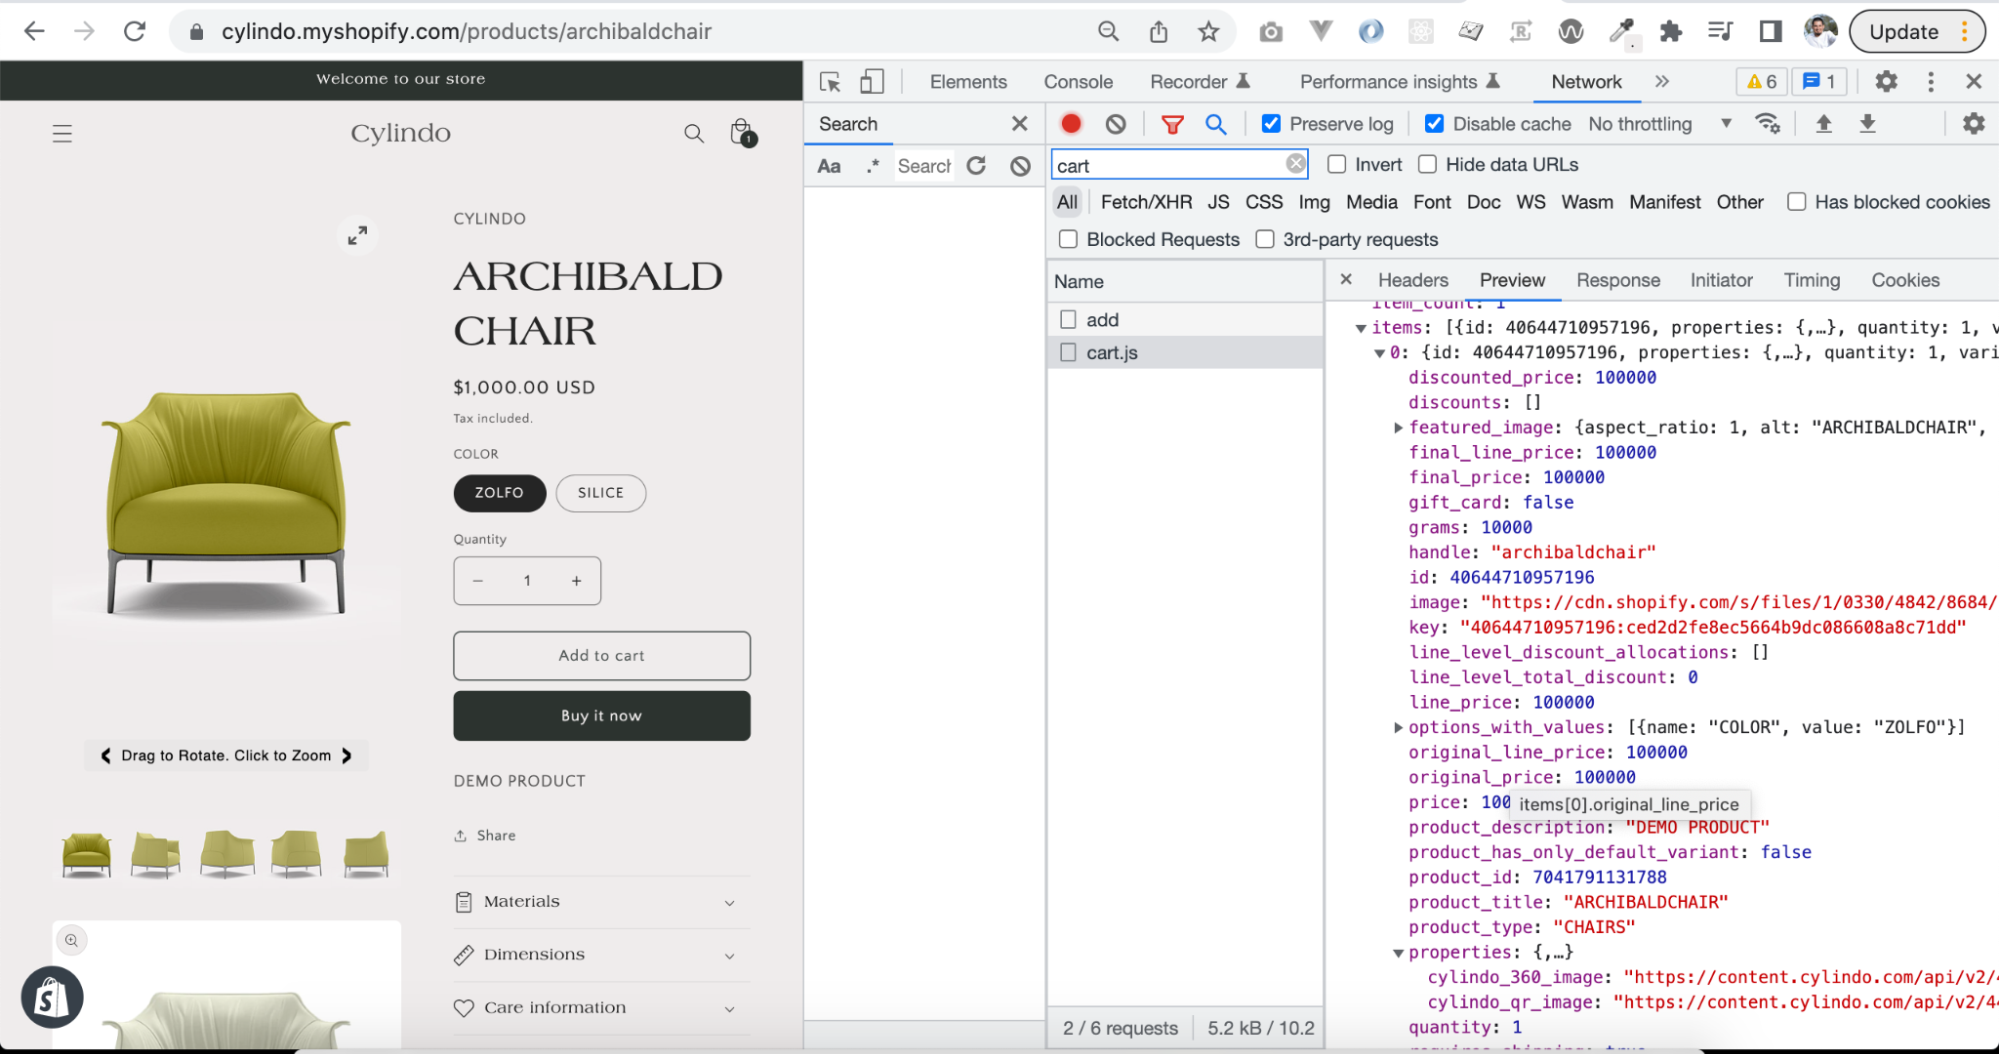
Please notice that for this example, we’re pulling an image of a 360 frame and the QR code to launch our AR experience on mobile devices.
https://content.cylindo.com/api/v2/__ACCOUNT_ID__/products/__PRODUCT_CODE__/frames/1/image.JPG?__QUERY_STRING__
https://content.cylindo.com/api/v2/__ACCOUNT_ID__/products/__PRODUCT_CODE__/ARQR/__PRODUCT_CODE__?__QUERY_STRING__
In case a different cylindo image is needed, for example, a different frame number, or background, the changes need to be handled with the Content API
You can read more about the Content API here.